
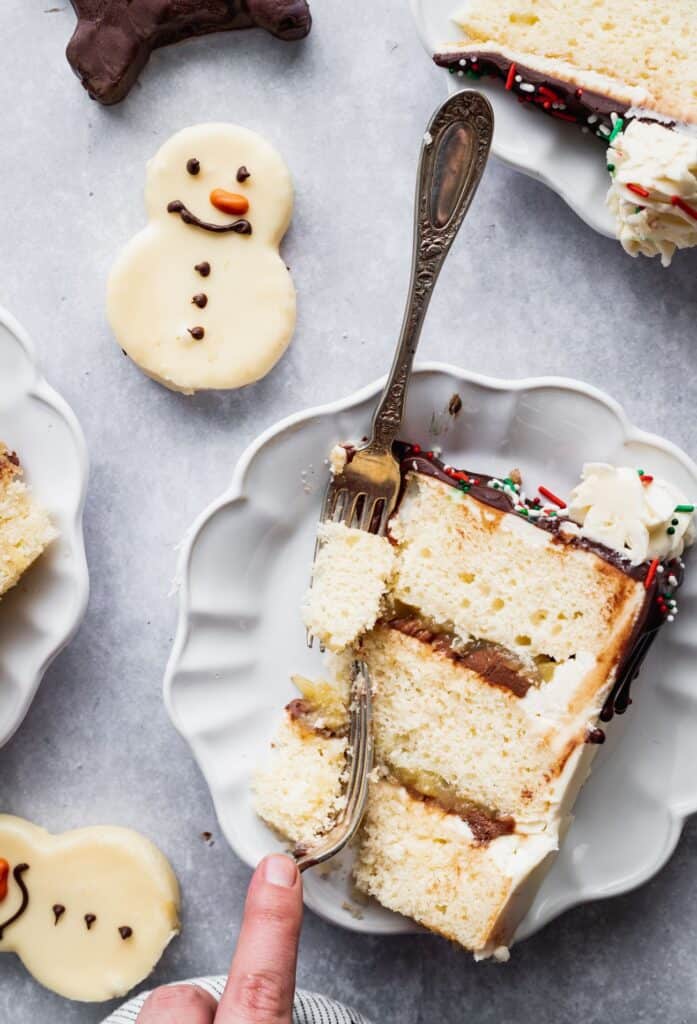
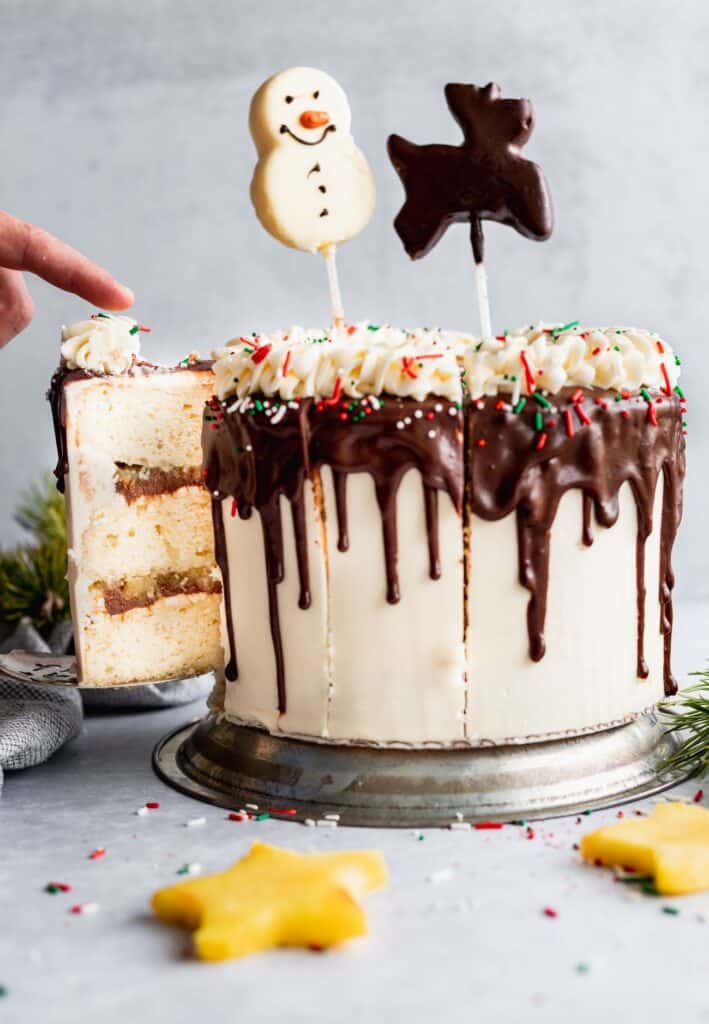
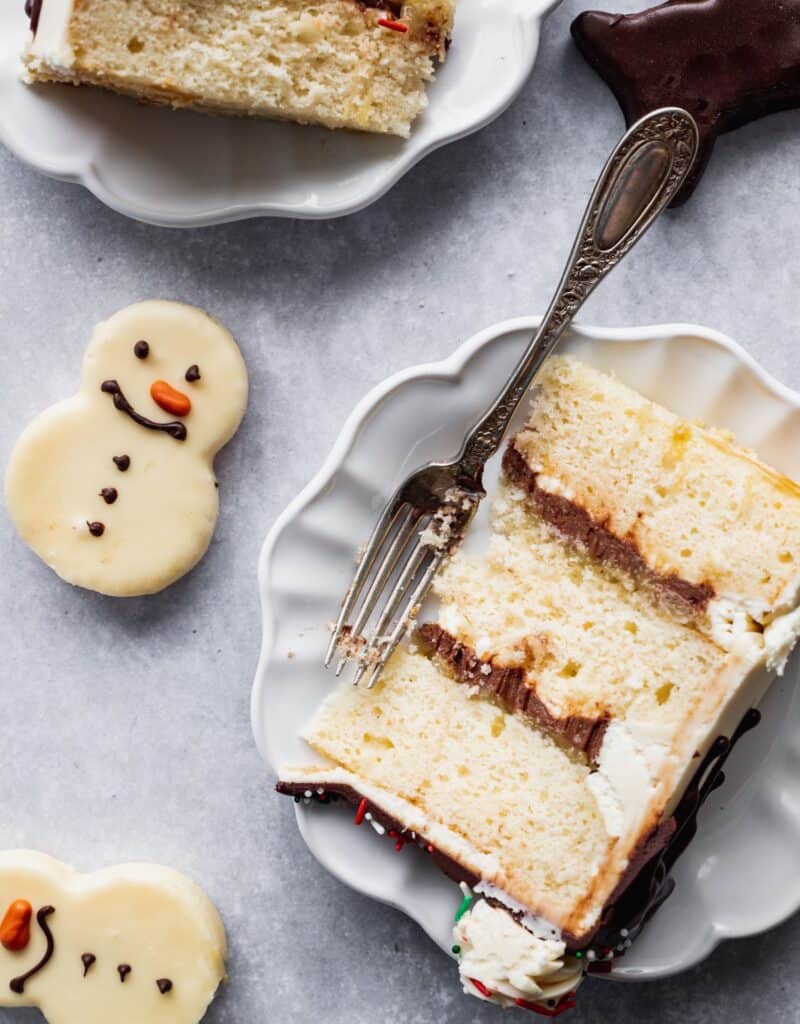
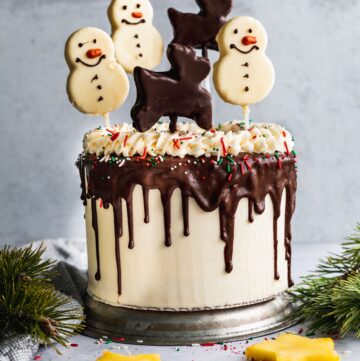
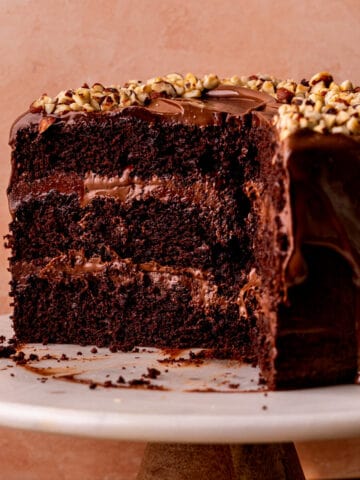
This moist pineapple chocolate cake is the perfect tropical cake no matter the season! It is a vanilla layered cake with a pineapple filling and whipped chocolate ganache. It is topped with a silky buttercream, chocolate drip, and chocolate covered pineapples.
This post is sponsored by Edible Arrangements and all thoughts and opinions are my own. Thank you for supporting the brands that make Stephanie's Sweet Treats possible!
Chocolate Covered Pineapples
I find that sometimes the holidays can be full of very rich and heavy desserts. This vanilla cake is super light! It has a pineapple filling and chocolate. There is nothing better!
Edible Arrangements has a great Christmas gift basket. It is full of chocolate covered pineapples. It has a white chocolate snowman and chocolate reindeer. Inside is very fresh pineapple cut into those fun shapes.
Edible Arrangements only has the freshest ingredients and I just had to make a fun cake to celebrate that.

How To Make Moist Vanilla Cake
When recipe testing this cake, I tried making a pineapple cake and a vanilla cake coated in pineapple simple syrup. Ultimately I decided to go with this moist vanilla cake that has a pineapple flavor. You get a much stronger pineapple flavor when it is in the filling.
- Sift all dry ingredients together- Make sure to sift them all together to avoid any flour lumps.
- Beat butter and sugar- Beat the butter and sugar for a solid 3 minutes. The air whipping into the butter is what gives the cake a good rise.
- Add in egg whites and egg- The egg whites helps to give it a white color, while the full egg will help make it more moist. Make sure it is room temperature!
- Add in vanilla- Make sure it is a pure vanilla extract to get a stronger flavor.
- Add in dry ingredients and buttermilk- Do it in separate intervals with flour and buttermilk. This helps make sure everything get incorporated evenly.
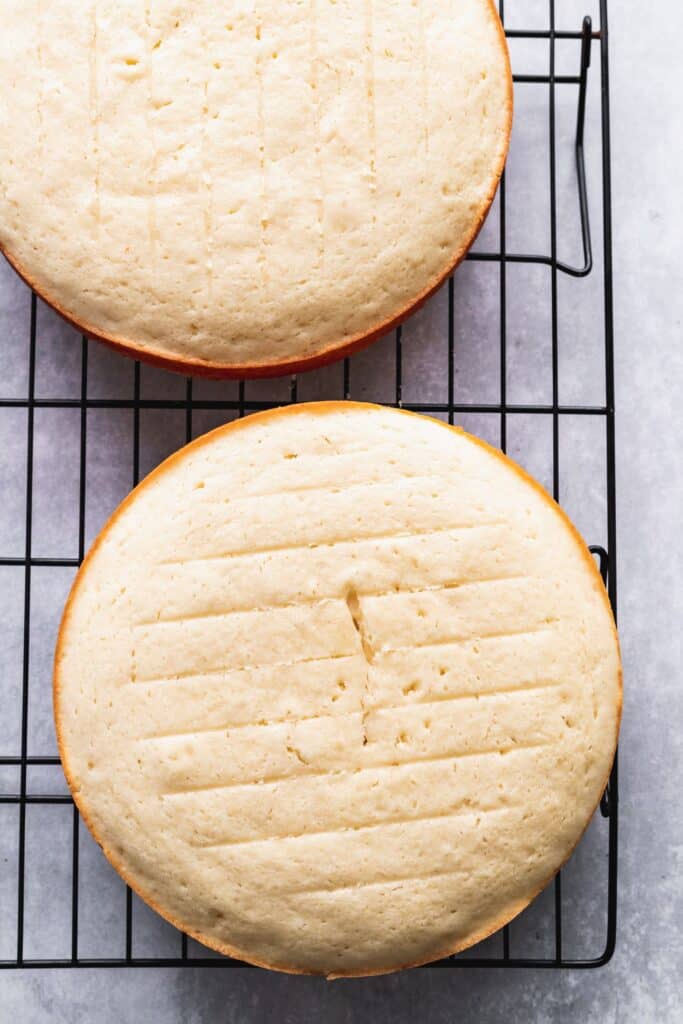
Once the batter is made, pour the batter into three 8 inch cake pans.

How To Prevent Cake From Sticking To The Pans
There is nothing worse than having your perfect cakes getting stuck to the cake pans!
To prevent this, first spray the pans with a baking non-stick spray. It has to be the spray with flour, make sure to spray it well.
Then, place an 8 inch parchment circle on the bottom of all 3 pans. Spray again with the baking spray to make sure it is good and greased.
After the cakes are done baking, let the cakes sit in the pans for 10 minutes. This will allow the cakes to slowly pull away from the edges of the pan.
Then, transfer to a cooling rack. It should come right out!
Making The Cake Ahead of Time
You can make the cake layers ahead of time. If you are making them less than 2 days before decorating, then wrap the cakes in cling wrap and store in the fridge. Then, let it sit at room temperature for 30 minutes before decorating.
If you make the cake layers more than 2 days ahead of time, wrap in cling wrap and store in the freezer. Make sure to let it sit on the counter for 1 hour before decorating.
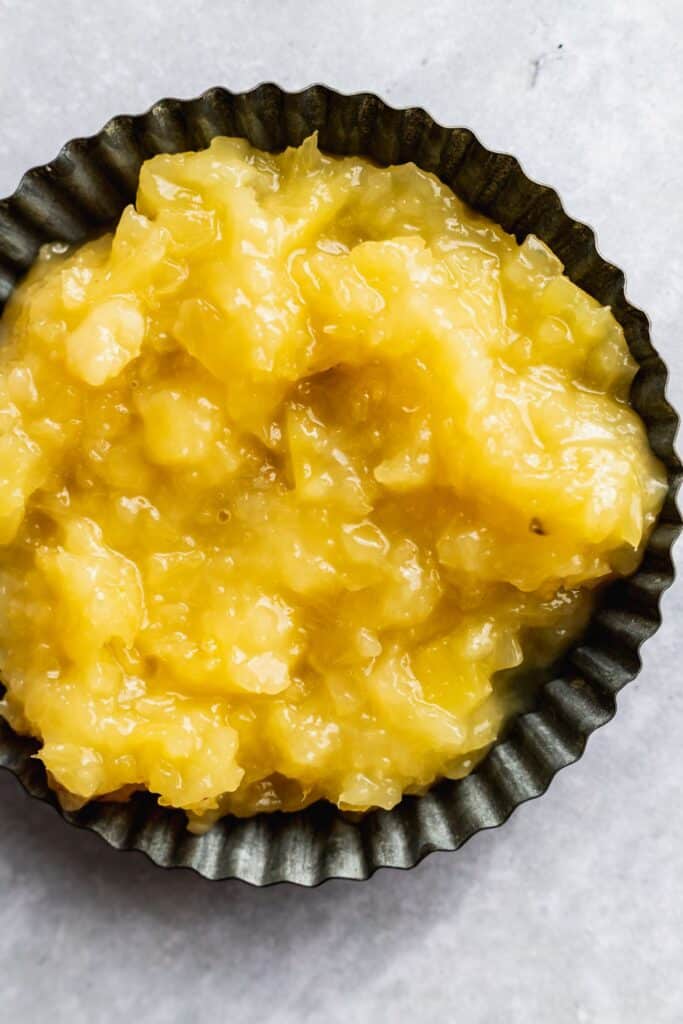
Pineapple Filling
This pineapple filling is actually very simple, but it packs a punch in the cake layers.
Start by mixing crushed pineapple (from a can), sugar and cornstarch. Then, cook it in a sauce pan for 5-10 minutes. It should be smooth and glossy. It will thicken as it cools.
Place a piece of cling wrap over the pineapple filling to prevent a film forming as it cools. Then, make sure it chills in the fridge completely before using it in the cake.
Whipped Chocolate Ganache
This chocolate filling is thick and fluffy, and it is made from a simple chocolate ganache. This whipped chocolate ganache should only be made right before use.
You can thicken the ganache in 2 different ways.
First, make the ganache and let it sit on the counter for 2 hours. Stir it every 15 minutes. It will thicken into a pudding consistency.
The other method is to make the ganache and then place in the freezer. Stir the ganache every 10 minutes. Stir until it reaches the pudding consistency. Take it out of the freezer immediately.
Once it is at the perfect consistency, use a hand mixer and beat on high to whip it up. This will take less than a minute. It is very easy to over whip the ganache, if that happens the chocolate will split. Whip up the chocolate until it is fluffy or light in color.
Assembling The Cake
Here are all my tips and tricks to assemble this pineapple chocolate cake.
- Use a 8 inch and 10 inch cardboard circles- The 8 inch circle will be the base for the cake, while the 10 inch circle acts as an easy way to transfer the cake to the freezer. Take them together.
- Use a small amount of frosting for the base- Place a small amount of frosting on the cake circle, this will be the glue to hold the cake in place.
- First layer- Place the 1st layer bottom side down. Then apply a small amount of frosting over the cake. Then pipe 2 layers of frosting around the edges of the cake. This will be the barrier to keep the fillings inside.
- Fillings- Spread half of the whipped chocolate ganache on top of the frosting. Then, spread ½ cup or ¾ cup on top of the chocolate. This depends on how strong of a pineapple flavor you want. In the photos I did a half cup.
- Second layer- Repeat with the second layer
- Last layer- Place the last layer on top, but make sure the bottom is up. This will give the cake the flattest top for decorating. Then, freeze the cake for 10 minutes. The cake has such a soft filling that it will be hard to decorate if you don't freeze it.
Frosting The Cake
First, you will need to apply a light layer of frosting on the cake. It should be a very light layer that you can see bit of the cake through. This is will be the crumb coat layer.
The crumb coat layer protects the outer layer of frosting from getting crumbs inside. Next, freeze the cake for 10 minutes.
Now, frost the rest of the cake. Once the cake is frosted, then add the chocolate drip to the cake.
Decorating The Cake
After you apply the chocolate drip to the cake, make sure to freeze the cake again for 10 minutes. Otherwise any extra frosting decoration will slide down the sides of the cake.
Now, it is time to use the Edible Arrangements snowman and reindeer.
These cute little guys are already on sticks, so it will be easy to stick on the top of the cake.
This will end up being a tall cake, so only place the decoration on top once you are ready to serve.
How To Store The Cake
This pineapple chocolate cake needs to be stored in the fridge in a cake carrier for up to 5 days.
You can store the cake slices in an air tight container as well.
Can This Cake Be Frozen
Yes! This cake can be frozen. I recommend freezing the cake slices individually and wrap them in cling wrap. Store them in an air tight container and keep them in the freezer up to 30 days.
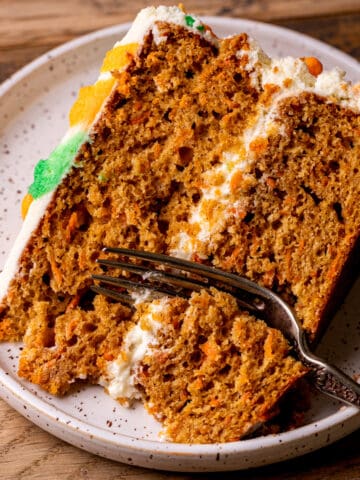
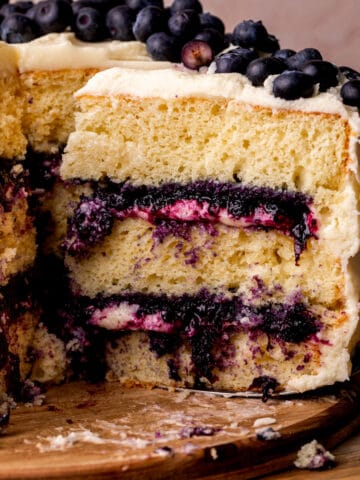
Other Cake Recipes To Try
Make sure to tag me on Instagram @stephaniesweettreats and leave me a review below if you made this cake. I hope you loved it! To get more ideas follow me on Pinterest.
📖 Recipe
Pineapple Chocolate Cake
Ingredients
Vanilla Cake
- 3 ¼ cups Cake flour
- 1 tablespoon Baking powder
- 1 teaspoon Salt
- 1 cup Unsalted butter room temperature
- 1 ¾ cups White granulated sugar
- 1 tablespoon Pure vanilla extract
- ½ cup Sour cream room temperature
- 5 Egg whites room temperature
- 1 Large egg room temperature
- 1 cup Buttermilk room temperature
Pineapple Filling
- 20 oz Crushed pineapple (canned)
- ⅔ cup White granulated sugar
- 2 tablespoon Cornstarch
Whipped Chocolate Ganache
- 1 cup Semi-sweet chocolate chips
- ¾ cup Heavy cream
Vanilla Whipped Buttercream
- 3 cups Unsalted butter slightly cold
- 9 cups Powdered sugar sifted
- 1 tablespoon Pure vanilla extract
- Pinch of salt
- 6 tablespoon Heavy cream
Chocolate Drip
- 1 cup Semi-sweet chocolate chips
- ¾ cup Heavy cream
- Sprinkles for decoration
- Edible arrangements chocolate covered pineapple
Instructions
Vanilla Cake
- Preheat oven to 350°F. Spray three 8 inch cake pans with non-stick baking spray. Line the bottoms with 8 inch parchment circles. Spray again with baking non-stick spray. Set aside
- In a large bowl, sift the cake flour, baking powder, and salt. Set aside.
- Using a mixer, beat the butter and sugar together on medium. Beat for 3 minute so the butter is light and fluffy, Add in sour cream and vanilla. Mix until combined. Add in egg whites and egg one at a time. Scrape the bowl and mix until combined.
- Add in ⅓ of the dry ingredients and half of the buttermilk. Mix until almost combined and add in another ⅓ of dry ingredients and rest of buttermilk. Mix again. Then, add in the rest of the dry ingredients. Scrape the bowl and mix again for 20 seconds.
- Pour batter evenly through the three cake pans by using a kitchen scale. Bake for 16-20 minutes The cake is done baking when a toothpick inserted comes out clean.
- Let cakes sit in the pans for 10 minutes, then transfer to a cooling rack. Allow cakes to cool completely before decorating.
Pineapple Filling
- Make this 1 day before decorating. In a saucepan over medium heat, mix the crushed pineapples, sugar, and cornstarch. Heat until simmering. Make sure to stir to avoid burning the bottom. Heat for 5-10 minutes until the pineapple is smooth and shiny.
- Pour pineapple into a Tupperware and place cling wrap right over pineapple to avoid a film forming. Let it cool completely. Then, store in the fridge and allow it to completely chill before using.
Whipped Chocolate Ganache
- In a small bowl, pour the chocolate chips. In a sauce pan over medium-low heat, heat the heavy cream. Heat until hot and steaming. Pour hot cream over the chocolate chips.
- Let it sit for 1 minute and 30 seconds. Then, use a rubber spatula and stir until smooth.
- Let it sit at room temperature for 2 hours. Stirring every 20 minutes. 2 hours in it will look like pudding. Or place in freezer and mix every 10 minutes. Only keep in freezer until it thickens and looks like pudding.
- Use a mixer with a whisk attachment ( I used a hand mixer) beat the chocolate on high for less than 1 minute. Beat until it lightens in color and thickens like a frosting. It doesn't take very long.
Vanilla Whipped Buttercream
- Pull butter out to the counter. Let it sit for 30 minutes for the butter to be slightly cold. In a large mixing bowl, sift the powdered sugar. Set aside.
- Using a mixer, beat the butter for 2 minutes on medium-high. Beat until light and fluffy. Add in powdered sugar. Add in very slowly on low to avoid a large mess. Then, add in heavy cream, salt, and vanilla. Mix on low until mixed together
- Turn to high and beat for 4 minutes. Scrape the bowl and beat again for 1 minute. Take off mixer. Use a wooden spoon to beat the air bubbles out.
Chocolate Drip
- Start this only right before you need it. Pour chocolate chips in a small bowl. Heat heavy cream in a sauce pan over medium-low heat. Heat cream until hot and steaming. Pour hot cream over chocolate chips.
- Let it sit for 1 minute and 30 seconds. Then, stir until smooth and glossy. Save ¼ of chocolate to drip on the cake. Pour in a squeeze bottle or piping bag.
Assembly
- Place 1st layer bottom side down. Spread a small amount of frosting on the cake. Pipe a border around the edge of the cake. Do this twice. This creates a barrier so the filling doesn't escape.
- Spread half of the whipped chocolate ganache on the cake. Pour ½ cup to ¾ cup of pineapple filling on top of the chocolate. Spread until smooth and even.
- Repeat with the second layer.
- Place last layer bottom side up. Place cake in freezer for 10 minutes to set the filling. Take cake out and apply a thin layer of frosting for the crumb coat. Freeze cake for 15 minutes.
- Frost the rest of the cake. Pour the chocolate drip. Start by drizzling it down the sides with the squeeze bottle or piping bag. Pour the rest of the chocolate on top of the cake. Use an offset icing spatula to spread icing to the edge of the cake. It will go a little bit down the sides of the cake. Spread the rest of the chocolate on the cake until smooth.
- Freeze cake for 10 minutes to set the chocolate. Pipe any decoration on top of the cake. Top with sprinkles.
Karl says
In the notes you say:
Pull all dairy ingredients out 2 hours before making.
Whipped chocolate ganache- Make this only before you decorate the cake.
In the method you state it's the chocolate drip that needs to be made last minute as the ganache needs two hours before using. Can I just double check which part is right? Thank you in advance. I hope to try this out this weekend
Stephanie Rutherford says
The heavy cream needed for the whipped ganache and chocolate drip doesn't need to be pulled out ahead of time to get to room temp. That instructions for pulling ingredients out 2 hours before hand is if it says "Room Temperature" next to the ingredient.
The whipped chocolate ganache takes about 2 hour to get to firm up to a frosting like texture before you whip it. You can also put it in the fridge for 45 minutes stirring every 10 minutes until you get that pudding texture. Then, you can whip it up. I don't recommend making the whipped chocolate ganache ahead of time, right after you whip it is the best time to spread on the cake layers.
Now the chocolate drip needs to be a "liquid consistency" for you to drip on the cake. The chocolate drip and whipped chocolate ganache are two separate things.
Hope this helps!