Peanut Butter Butterfinger Pie

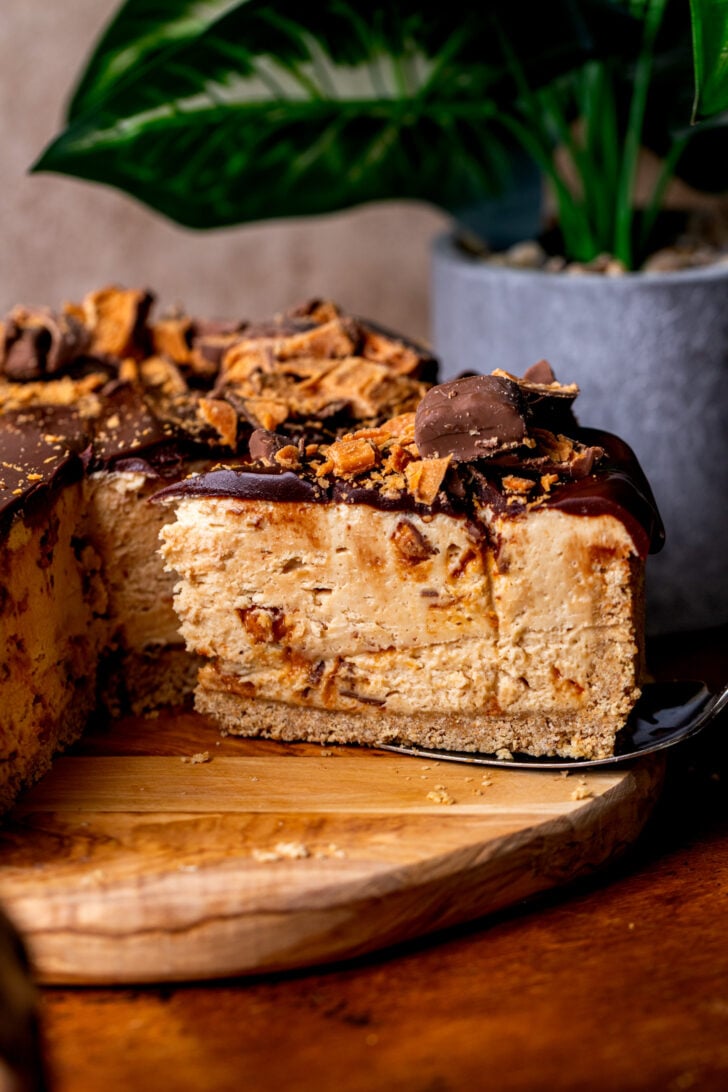
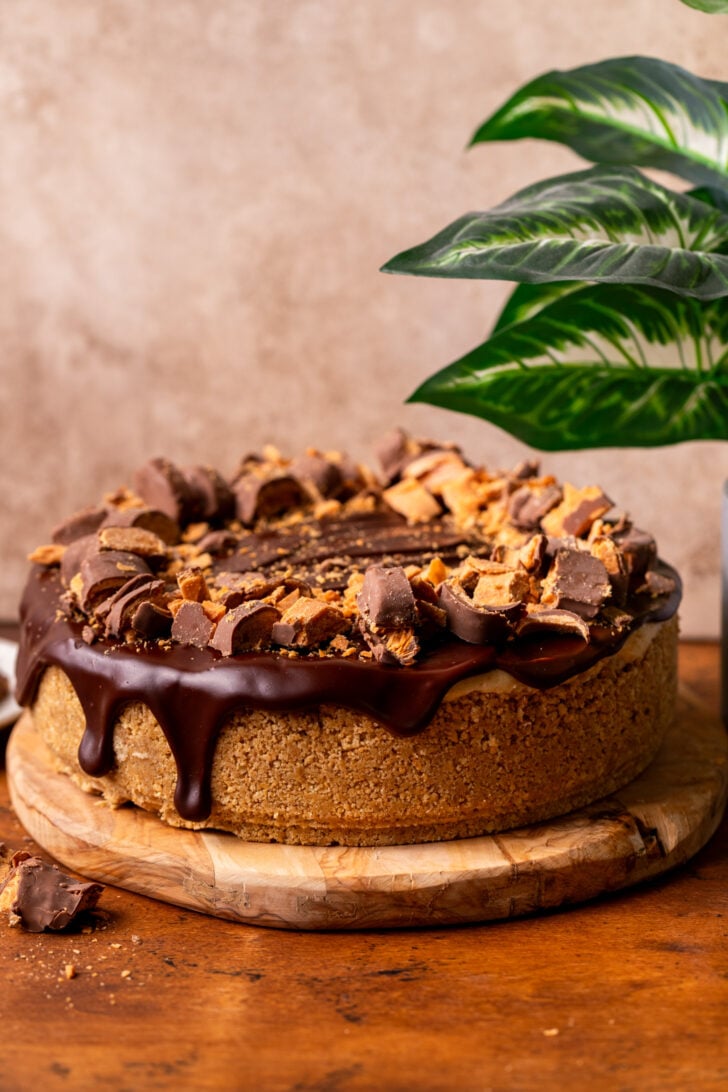
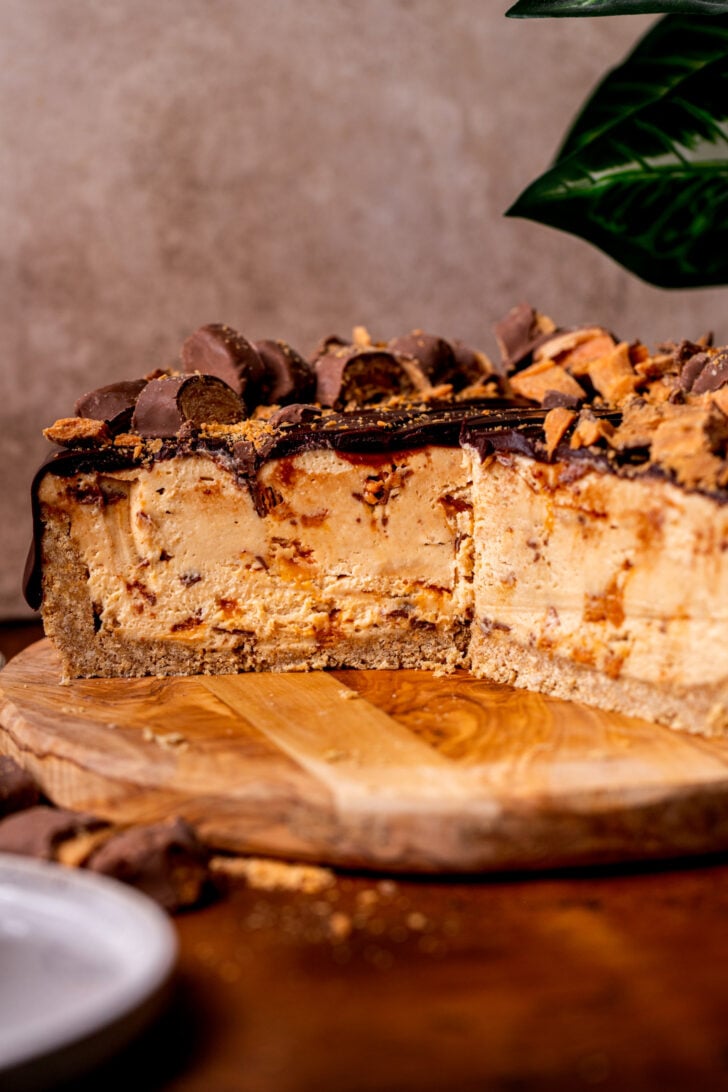
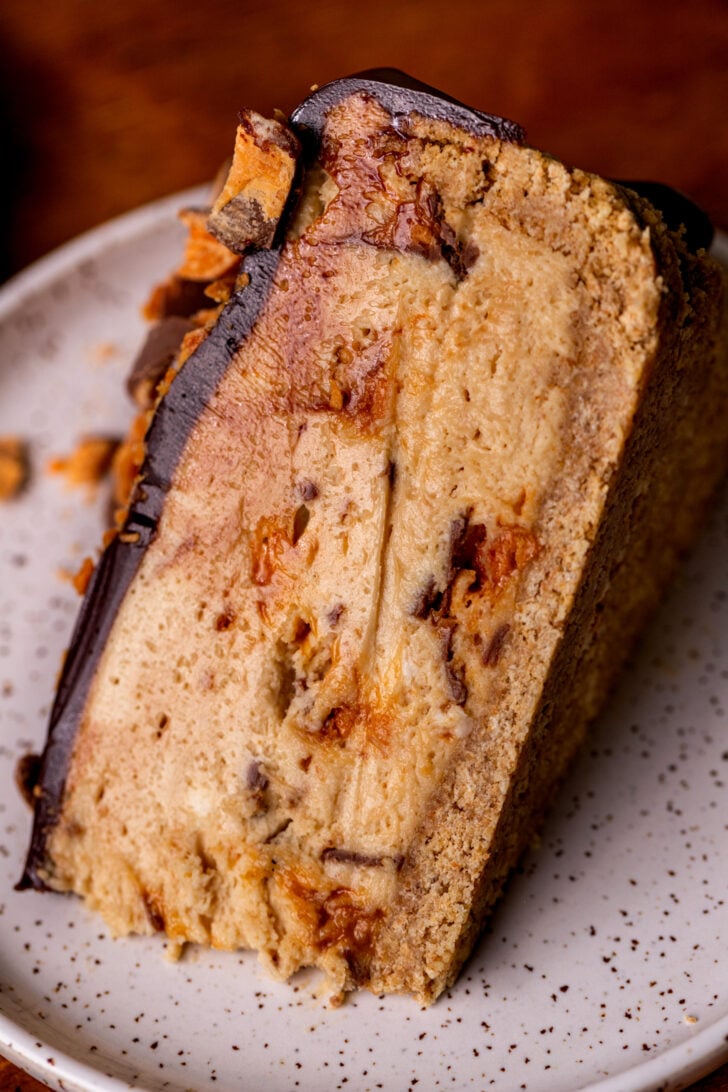
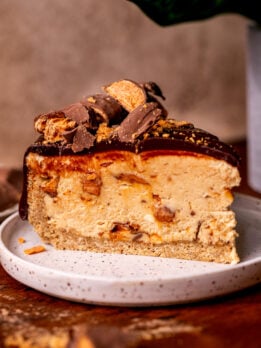
This Butterfinger pie is a no bake pie. It has a graham cracker crust, peanut butter pie filling filled with chopped butterfingers. It is also topped with chocolate ganache. This easy dessert is the best way to enjoy your favorite candy bar.
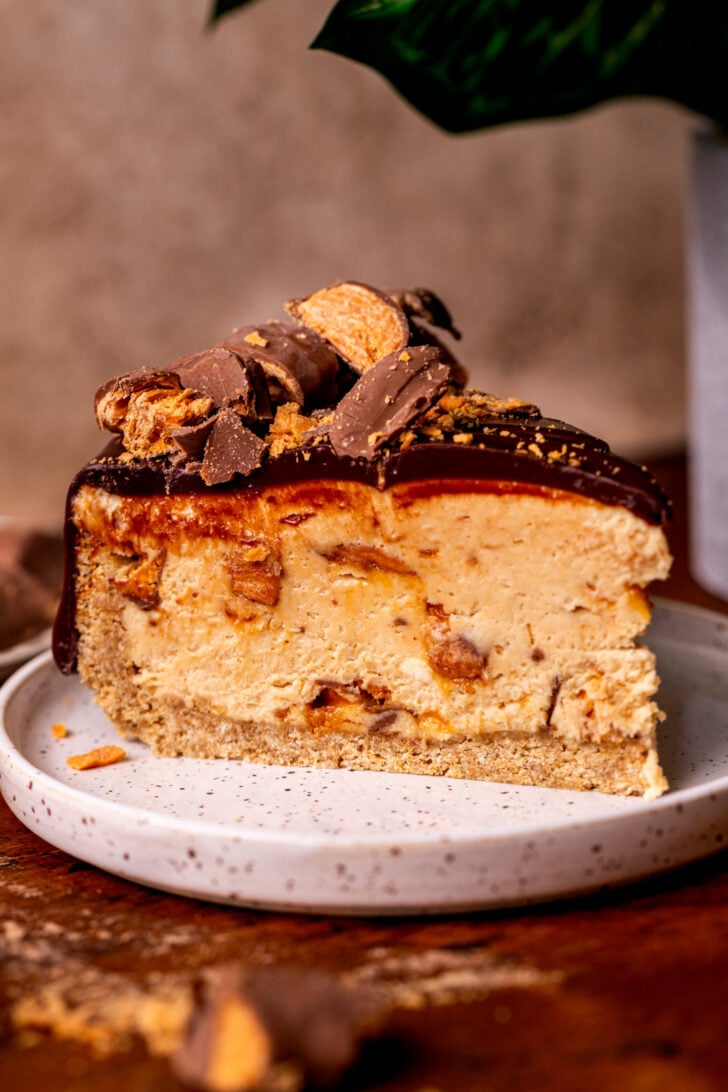
This butterfinger pie is an amazing excuse to eat a peanut butter pie. The peanut butter pie filling mixed with crunchy butterfingers is my favorite part. It gives the pie some texture. It is made in a springform pan instead of a pie pan to easily remove the pie slices.
Tips for making the pie
Here are my tips, so yours turns out like this recipe!
- Tip 1: The crust is more “wet” than normal, so that when it is cold it firms up the melted butter and the crust stays together since it’s no bake.
- Tip 2: I used 1 1/2 bags of fun size butterfingers for this recipe.
- Tip 3: When folding in the whipped cream, be gentle to not knock out the air. Otherwise the pie will not set. I do a back forth motion to help blend in the pie batter.
Save this Recipe!
For more peanut butter recipes, try my chocolate peanut butter pie and Reese’s peanut butter pie.
Make sure to leave a star review if you loved this recipe! Make sure to tag me on Instagram @stephaniesweettreats. To get more ideas follow me on Pinterest.
Recipe Video
Peanut Butter Butterfinger Pie
Ingredients
Graham Cracker Crust
- 2 1/2 cups Graham cracker crumbs, fine crumb
- 1/4 cup Brown sugar, packed light or dark
- 11 TBSP Unsalted butter, melted
Butterfinger Pie
- 16 oz Cream cheese, room temperature
- 1 1/2 cups Peanut butter, creamy
- 1 tsp Pure vanilla extract
- 1 cup Powdered sugar
- 1 1/2 cups Heavy cream, cold
- 1/4 cup Powdered sugar
- 1 1/2 cups Chopped Butterfingers, Buy a 10 oz bag
Chocolate Ganache
- 1 cup Semi-sweet chocolate chips
- 1/2 cup Heavy cream
- Chopped Butterfingers, for decoration
Instructions
Graham Cracker Crust
- Spray a 9-inch springform pan with baking nonstick spray. Set aside.
- Using a food processor, blend the graham crackers into a fine crumb. In a bowl, mix the graham cracker crumbs, brown sugar, and melted butter using a fork.2 1/2 cups Graham cracker crumbs, 1/4 cup Brown sugar, 11 TBSP Unsalted butter
- Pour the crumbs into the springform pan. Use your hands to press the crust halfway up the sides of the pan. Use the back of a measuring cup to compact the crust. Place in the freezer while you make the filling.
Butterfinger Pie
- Chop the Butterfingers into small pieces. I used fun sized butterfingers and choped each one into 5ths.
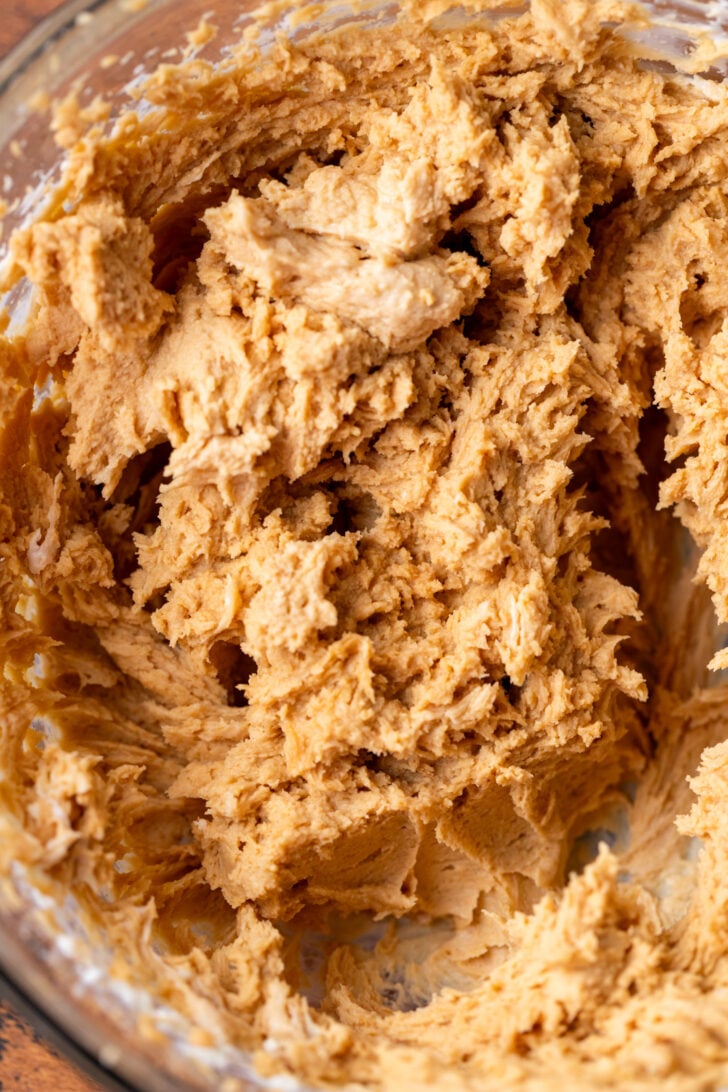
- Using a mixer, beat the cream cheese and peanut butter on high speed for 2 minutes. Add in the vanilla and the powdered sugar. Mix until smooth.16 oz Cream cheese, 1 1/2 cups Peanut butter, 1 tsp Pure vanilla extract, 1 cup Powdered sugar
- Using a metal bowl and whisk attachment with the mixer, beat the heavy cream and powdered sugar on high speed until stiff peaks.1 1/2 cups Heavy cream, 1/4 cup Powdered sugar
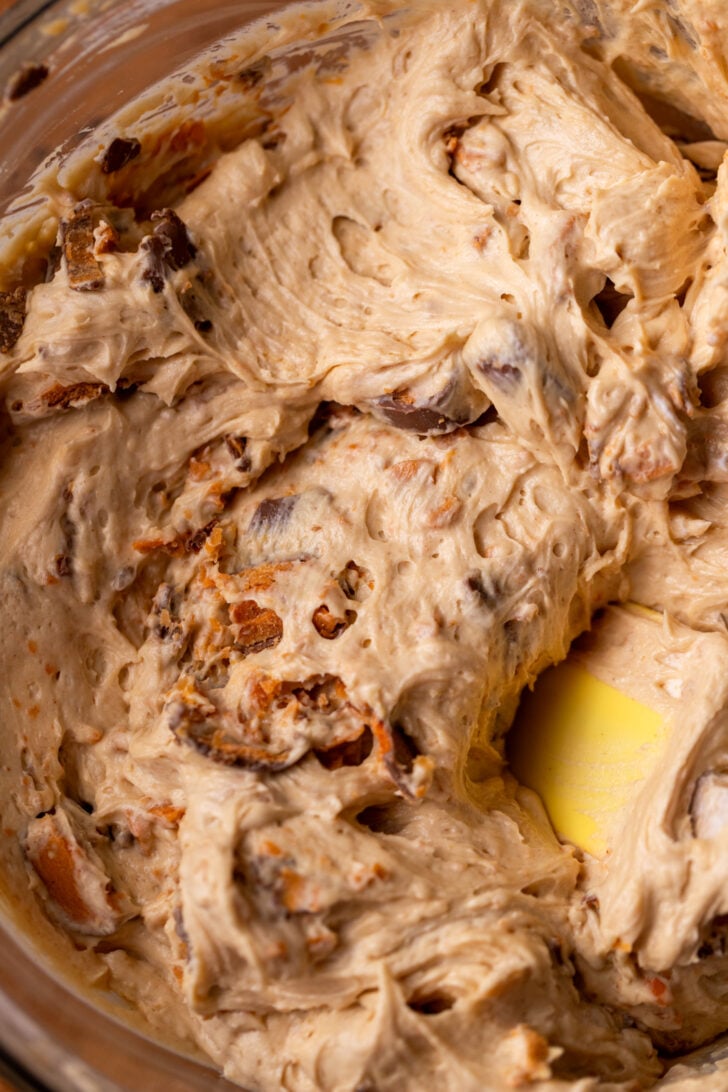
- Add the whipped cream into the cream cheese mixture. Use a rubber spatula to gently fold in the whipped cream. This takes about 2 minutes.
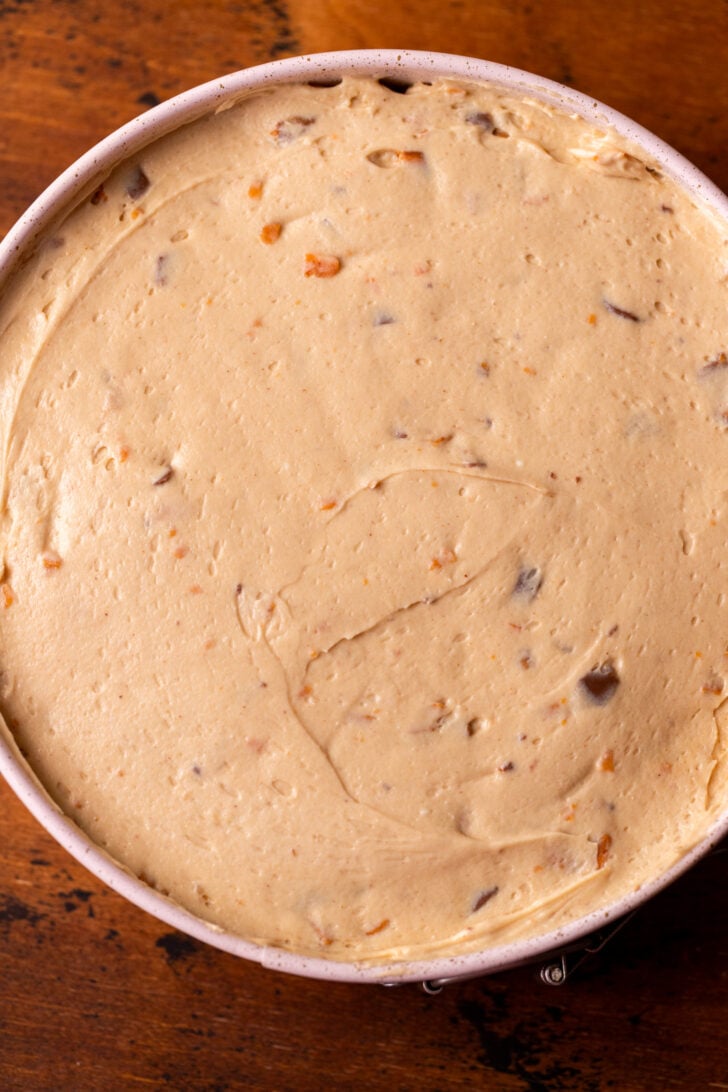
- Once it is almost all the way combined, add in the chopped Butterfingers.1 1/2 cups Chopped Butterfingers
- Pour the pie filling on top of the crust. Use an offset spatula to smooth down the top. Wrap in foil and chill for at least 6 hours or overnight. *You can make the ganache pour it on top then set it chill. For best looking results wait till you take off the pan before pouring on the ganache.
Chocolate Ganache
- In a small bowl, add the chocolate chips. Heat the heavy cream in a small saucepan over medium-low heat until steaming. Pour the hot cream over the chocolate chips and let it sit for 2 minutes.1 cup Semi-sweet chocolate chips, 1/2 cup Heavy cream
- Use a rubber spatula to mix the ganache until smooth. If any chocolate chunks remain, heat in the microwave for 10 seconds and stir until smooth.
- After releasing the springform pan, use a butter knife or straight icing spatula to go around the edges to release the edges. You can serve the pie with the bottom of the springform pan, or you can remove it. I took a knife to pry up the edge to stick a spatula underneath then moved it to my platter.
- Pour the ganache on top of the pie. Use an offset icing spatula to smooth the chocolate. Freeze the pie for 10 minutes to set the chocolate. Top with the cut butterfingers. I used 10 fun size to decorate.Chopped Butterfingers
My granddaughter made this as soon as you posted it! Brought it to me! I love butterfingers and peanut butter and graham crackers. It’s absolutely delicious. My favorite cheesecake so far! Thank you for sharing!