Cherry Cheesecake

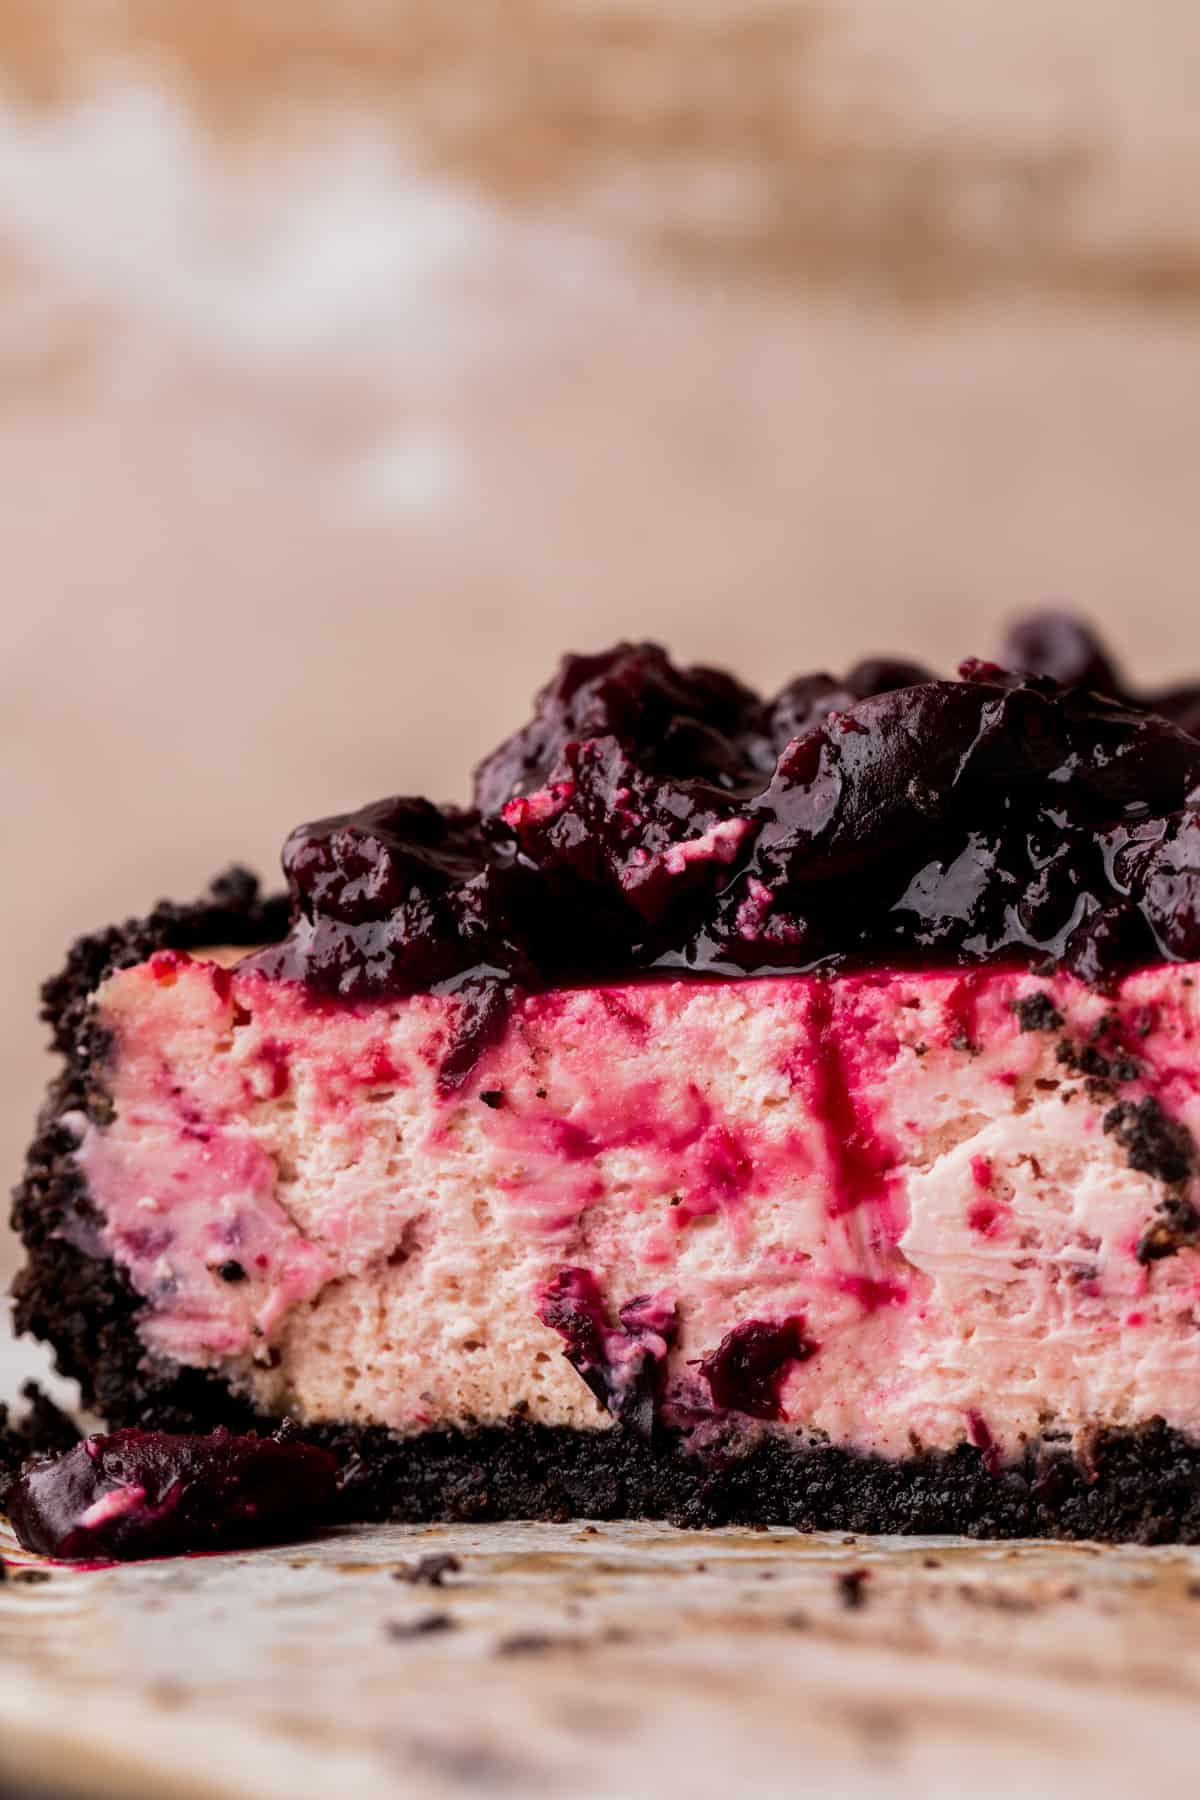
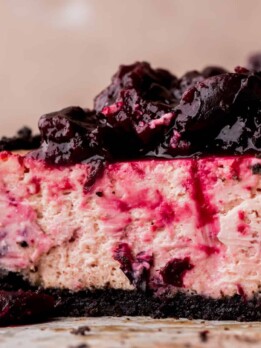
This cherry cheesecake is a baked cheesecake with an Oreo crust and has a creamy cheesecake with some of the cherry pie topping in the batter! It is also topped with cherry pie!
This cherry cheesecake is SO good. I have a deep love for cheesecakes, so I put a lot of love into making mine the most delicious and creamiest cheesecake. This is the perfect dessert for cheesecake lovers for any special occasions. I know a classic crowd-pleaser like this makes me popular at our family gathering.
For other classic dessert recipes try, Chocolate Peanut Butter Cake, Turtle Brownies, and Twix Cake.
Why This Cherry Cheesecake Recipe Works
- Fluffy cheesecake- Cheesecake was my first real baking love. You will love the fluffy texture guaranteed.
- Cherry flavor- This cheesecake has cherry not just on top, but throughout the cheesecake for a great flavor all the way through.
- Homemade cherry pie filling- This is way better than any can of cherry pie filling, and is very easy to make.
- Easy recipe- This recipe is written to be an easy cheesecake with simple steps so you can have the best cherry cheesecake even if you don’t often bake desserts. I include the perfect way to do a water bath!
Ingredient Notes for Cherry Cheesecake
Here are some notes on the ingredients. For a full list of ingredients, check out the recipe card below.
- Unsalted butter- The butter is melted for the Oreo crust. You can melt this in the microwave.
- Sour Cream- Use full fat sour cream or greek yogurt. Pull this out 2 hours before baking.
- Cream cheese- Use full fat cream cheese. Pull this out 2 hours before baking.
- Eggs- Pull the large eggs out 2 hours before baking so they are room temperature. I use whole egg, not egg white for the fatty yolk.
- Cherries- You can used frozen cherries of fresh cherries for this recipe.
Ingredient Substitutions
- Dairy free- You can use your favorite dairy free options for this recipe!
- Gluten free- I haven’t tested this gluten free. Let me know if you do.
Step By Step Instructions- Cherry Topping and Puree
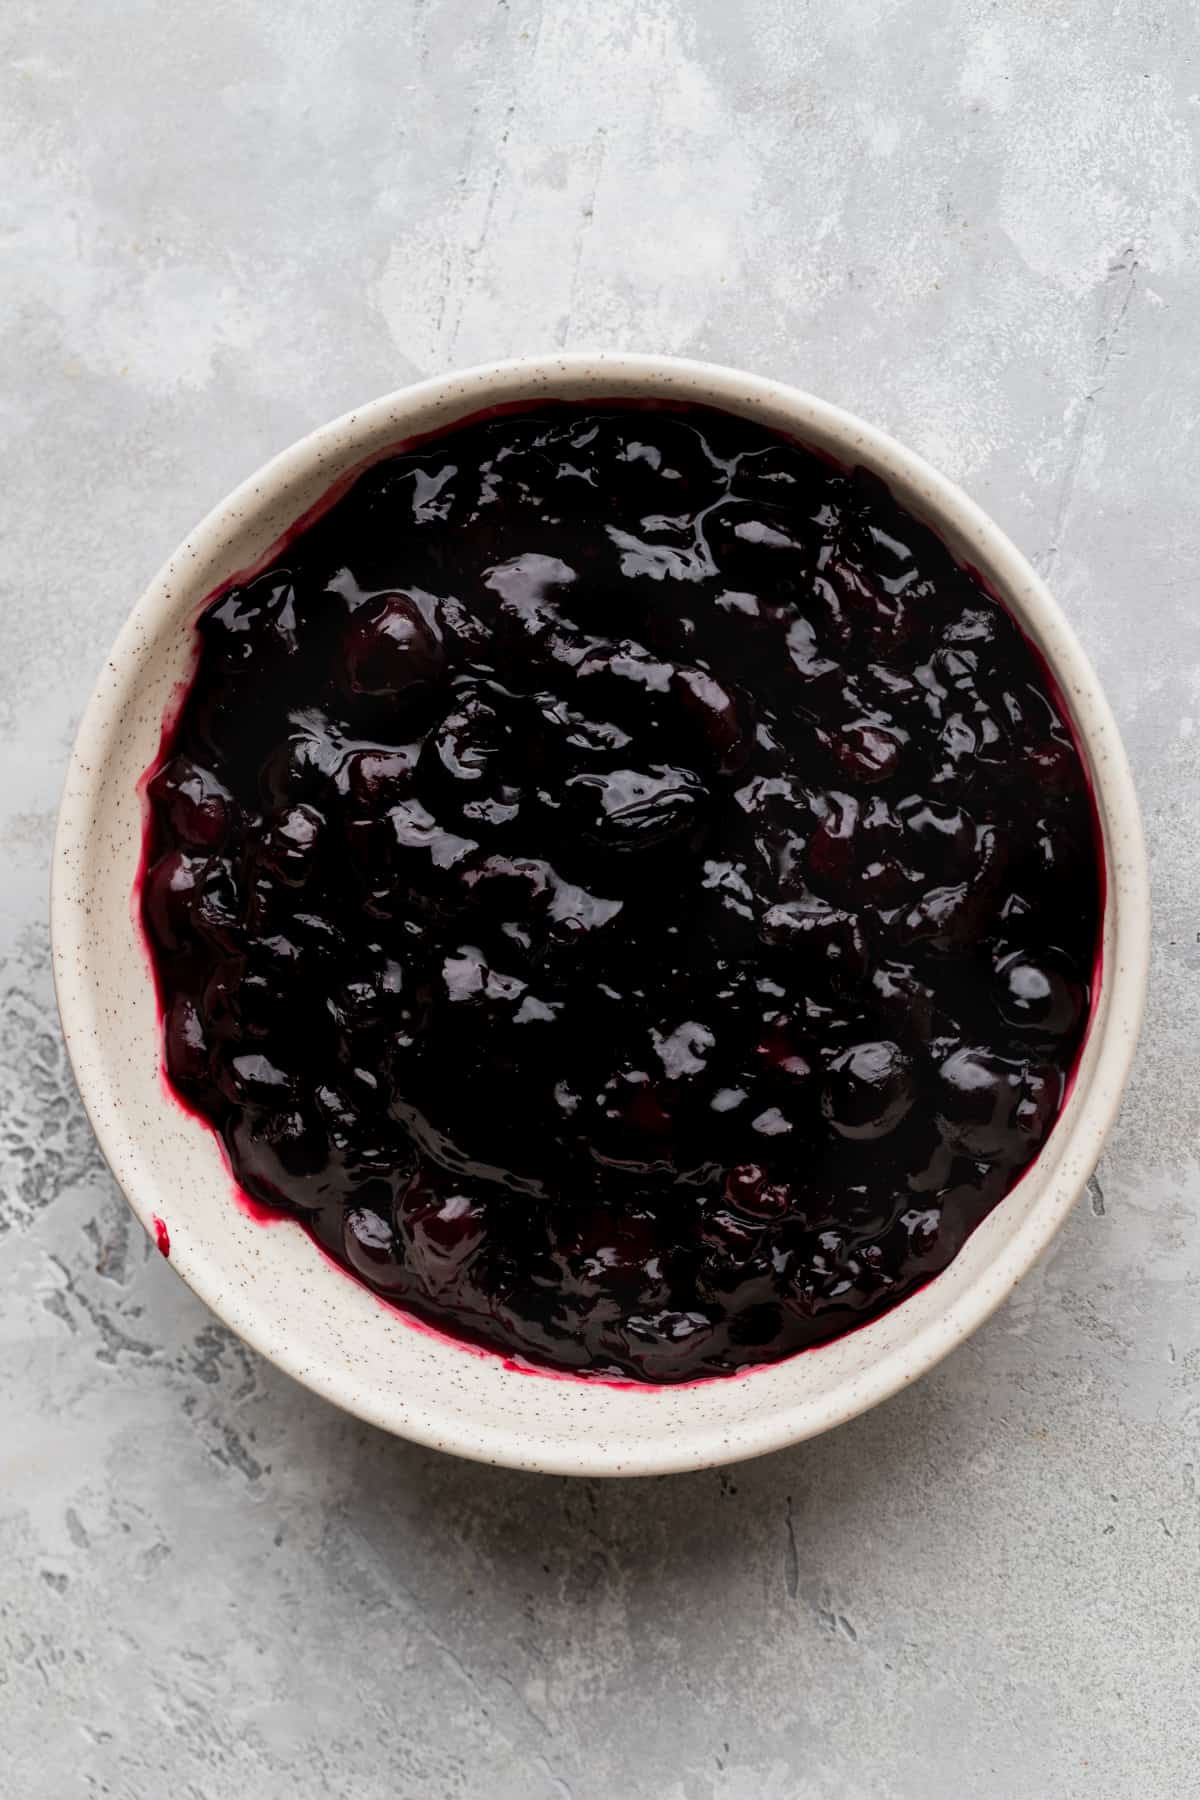
STEP 1: Make the cherry topping. Mix the cherries, sugar, and cornstarch into a medium saucepan and heat it on medium heat until the juice starts to separate.
Use your spatula to mash half of the cherries. Keep cooking until it thickens a little bit.
STEP 2: Make the puree. Take 1/2 cup of the cherry topping and use a food processor or blender to blend it into a puree. This will leave about 1/4 of puree afterwards.
STEP 3: Chill the topping and puree. Place cherry puree in the freezer for 15 minutes to cool so it can go in your batter.
Place the remainder of the topping in an airtight container in your refrigerator until you are ready to top the cheesecake.
Step By Step Instructions- Cheesecake
Here is how to make and bake this cheesecake. You will need a 9-inch parchment paper circle, 9-inch spring form pan, a hand mixer or a stand mixer with a paddle attachment, and a rubber spatula.
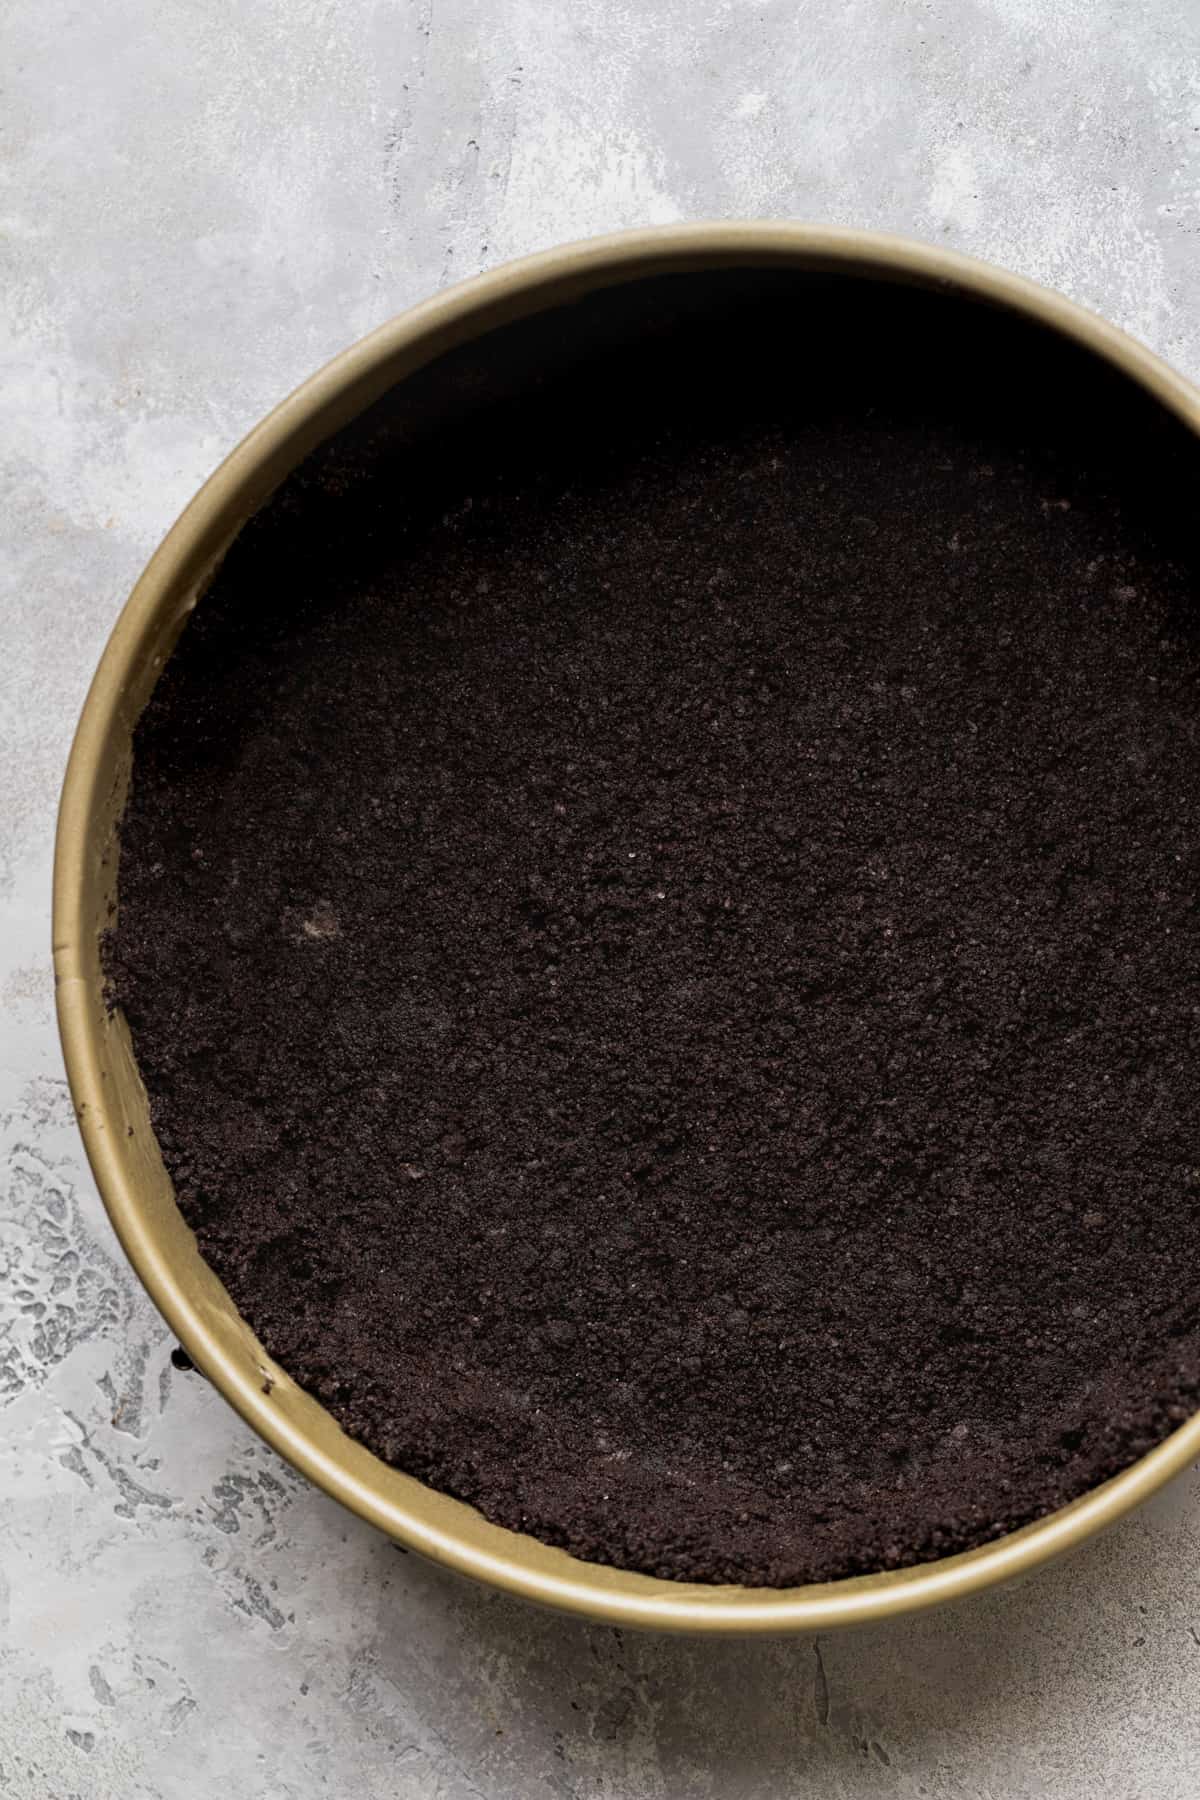
STEP 1: Make the crust. Using a food processor, blend the Oreos into fine crumbs. Mix them together with the melted butter using a fork.
STEP 2: Bake the crust. Pour the mixture into the bottom of 9-inch springform tin and use your hands to press the crust halfway up the sides of the pan. Then, use the back of a measuring cup to really compact the crust down.
Bake the crust for 10 minutes at 325 degree F.
STEP 3: Beat the cream cheese and sugar. Beat the cream cheese and sugar with your mixer in a large bowl on high speed for 2 minutes.
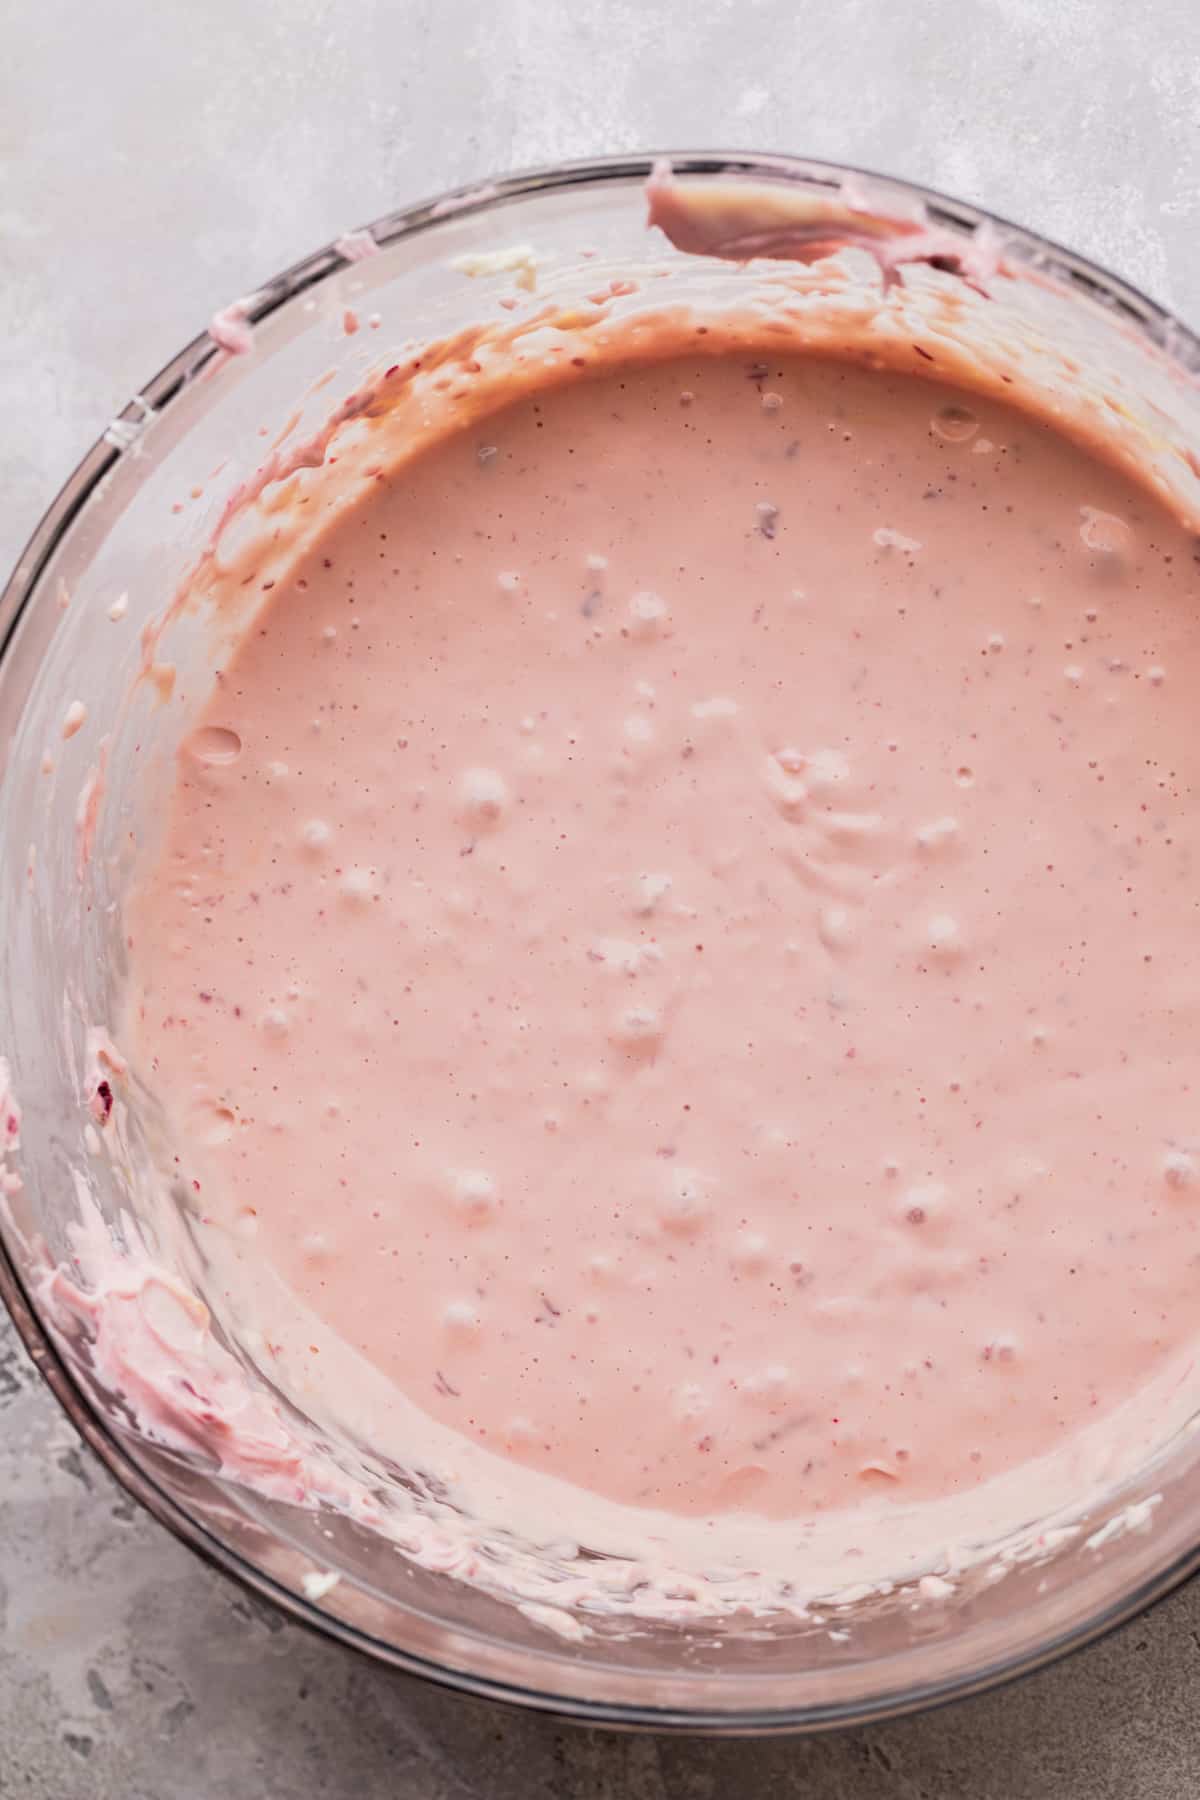
STEP 4: Add wet ingredients. Add the sour cream, cherry sauce, and vanilla extract to the cream cheese mixture. Mix on medium speed until combined.
Add in the eggs to the mixing bowl one at a time while mixing on low speed.

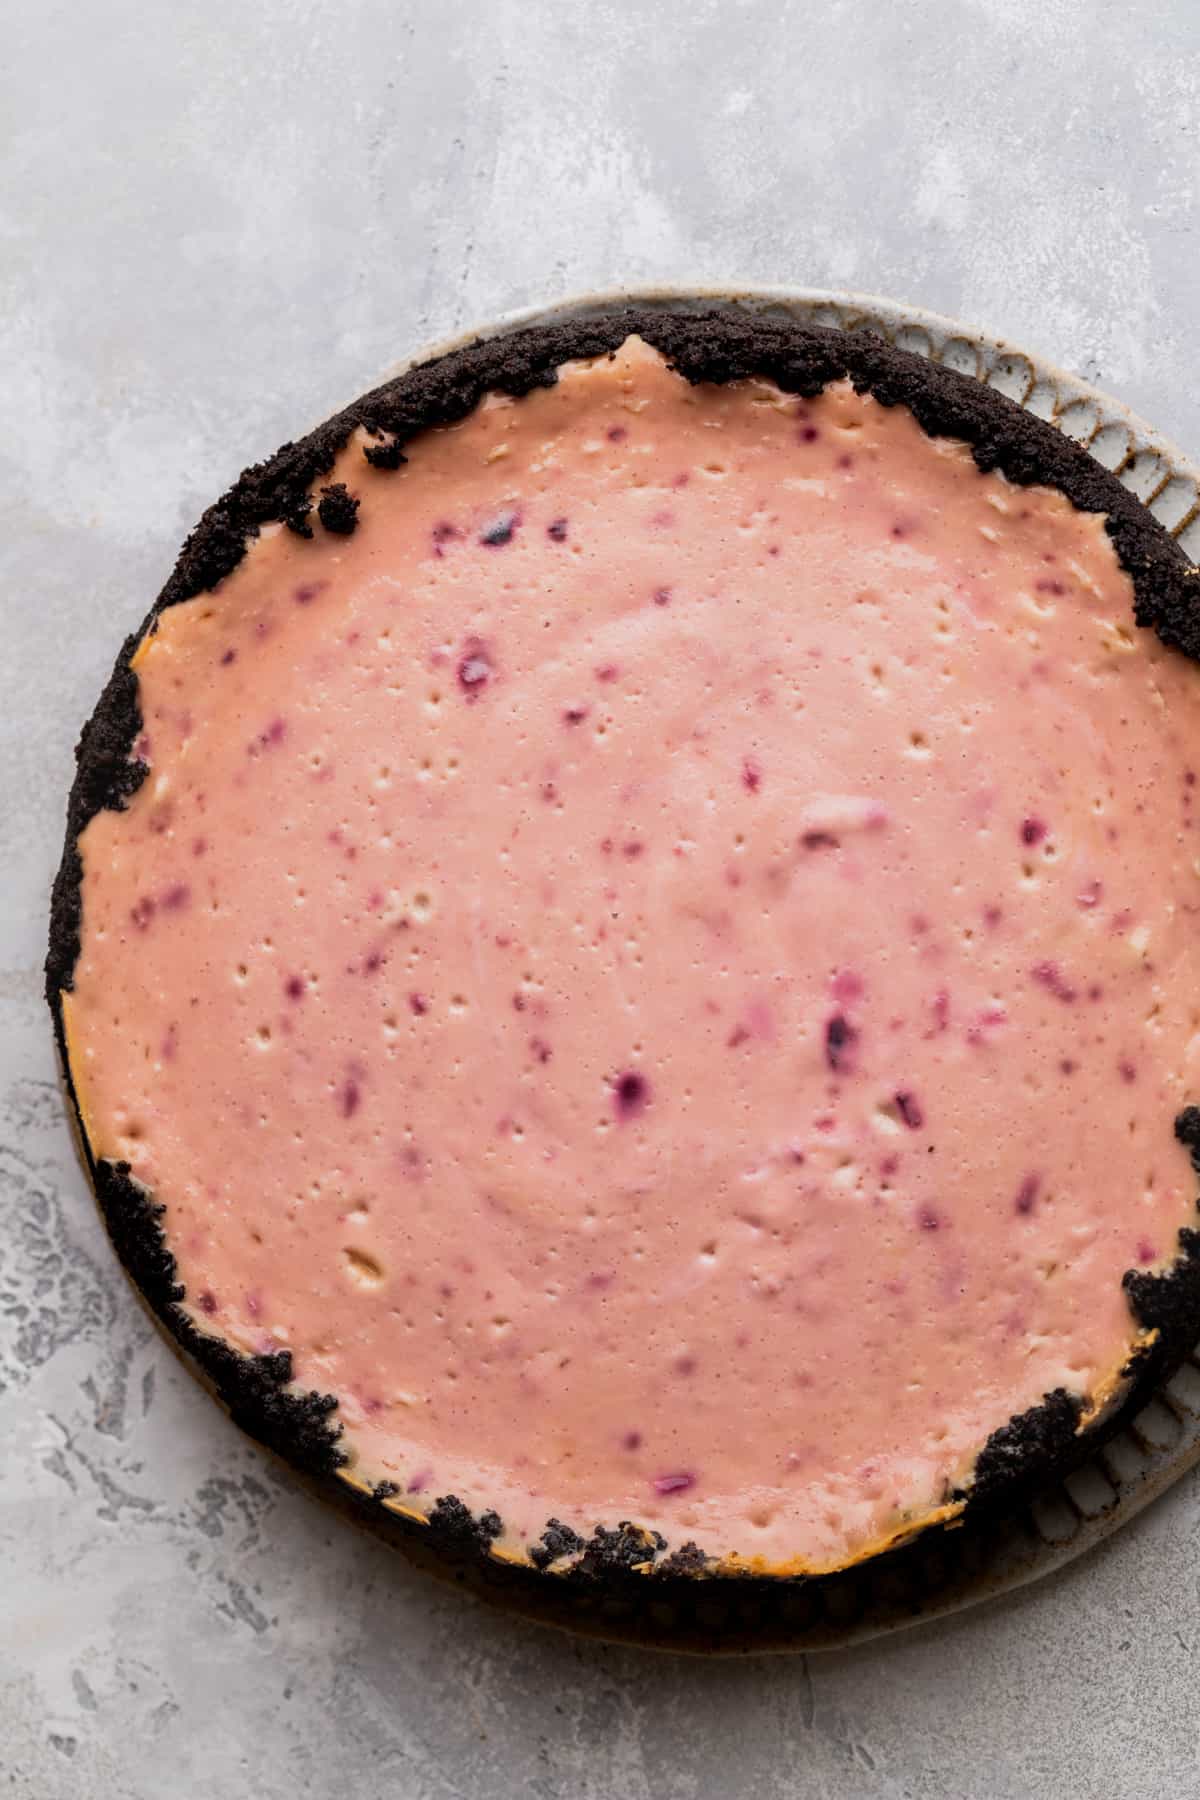
STEP 5: Bake the cheesecake. Pour the cheesecake mixture onto the crust. Place the pan in your water bath using one of the hot water bath methods listed below.
Bake cheesecake for 70-80 minutes. It is done when you can shift it and the middle only has a slight jiggle.
STEP 6: Cool cheesecake. Turn off the oven and prop the oven door. Let the cheesecake slightly cool for 30 minutes.
Then finish cooling on a cooling rack until room temperature. Cover and chill in the fridge for 6 hours or overnight.
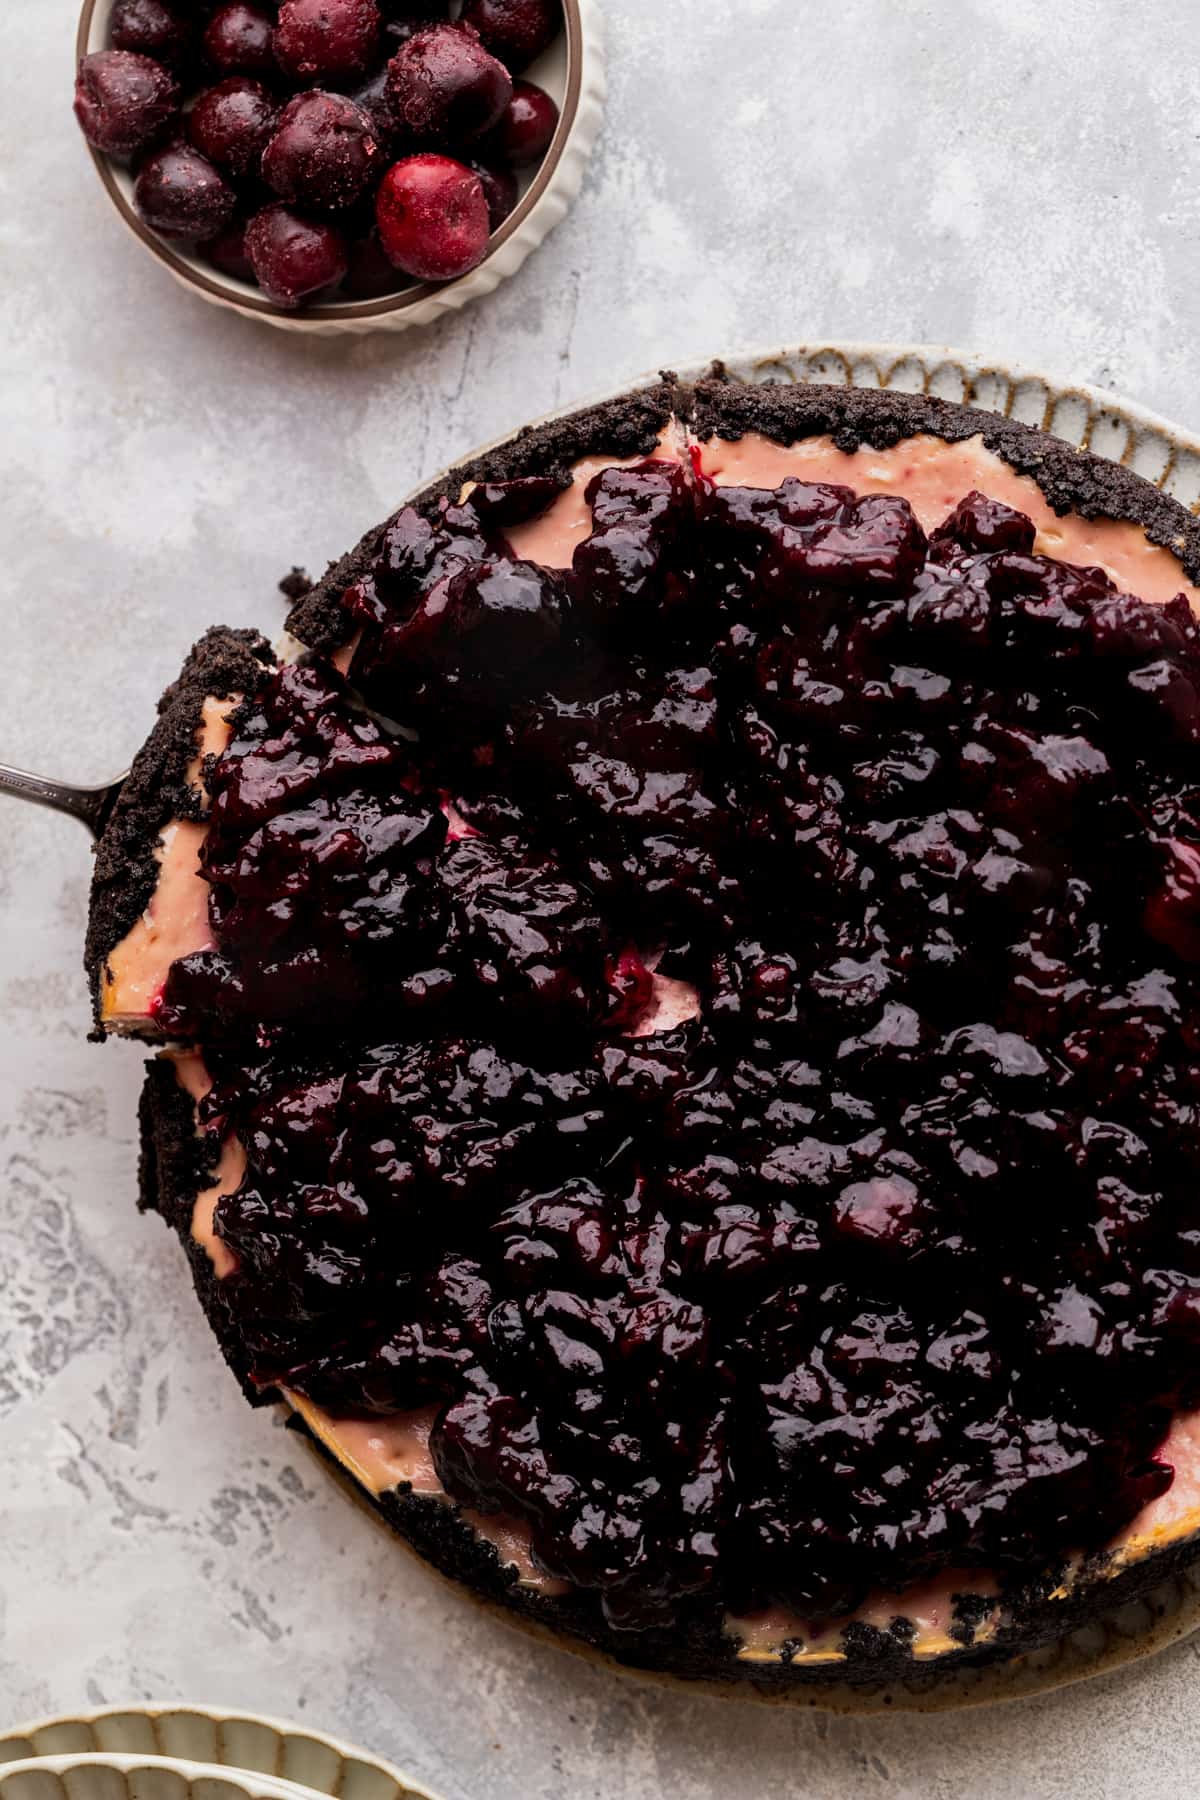
DECORATING THE CHEESECAKE
First thing, remove the cheesecake from the pan. Tilt it on it’s side to remove the parchment paper.
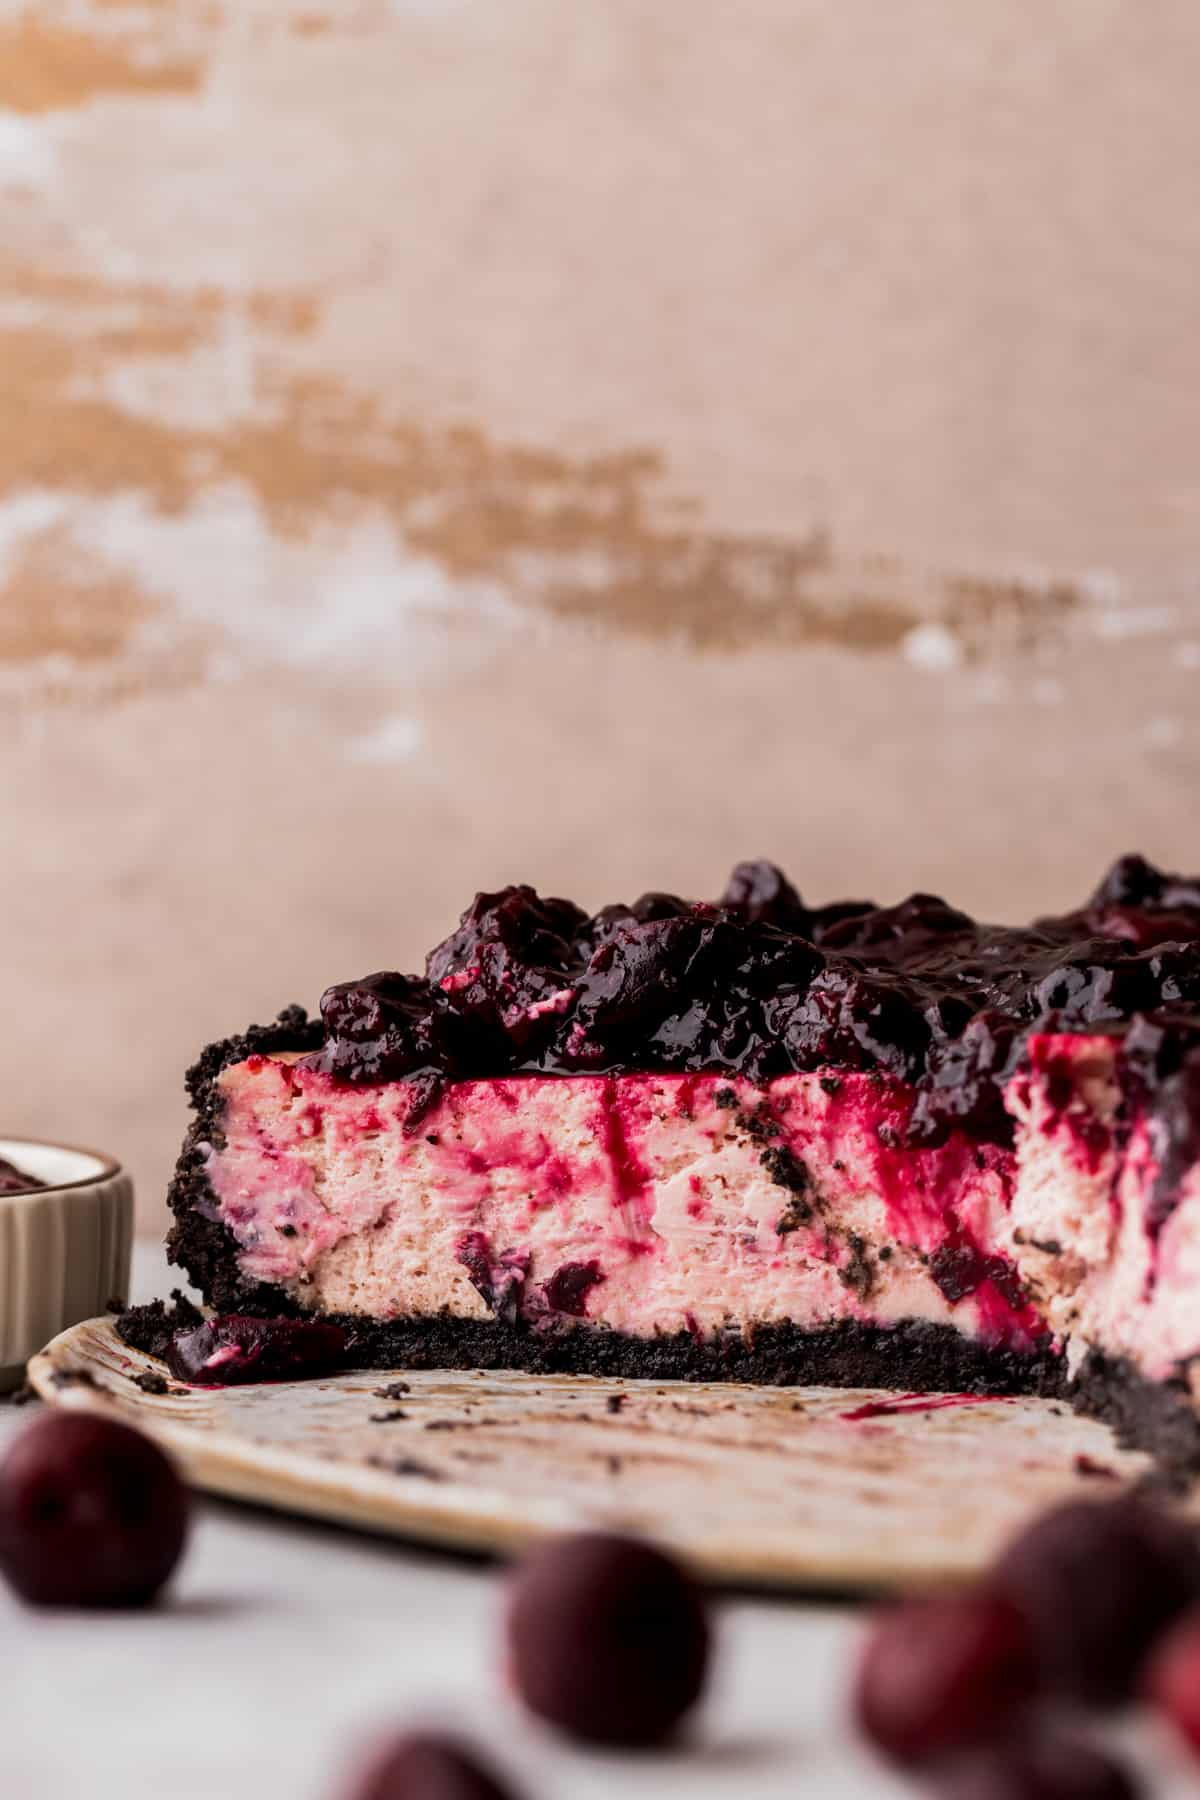
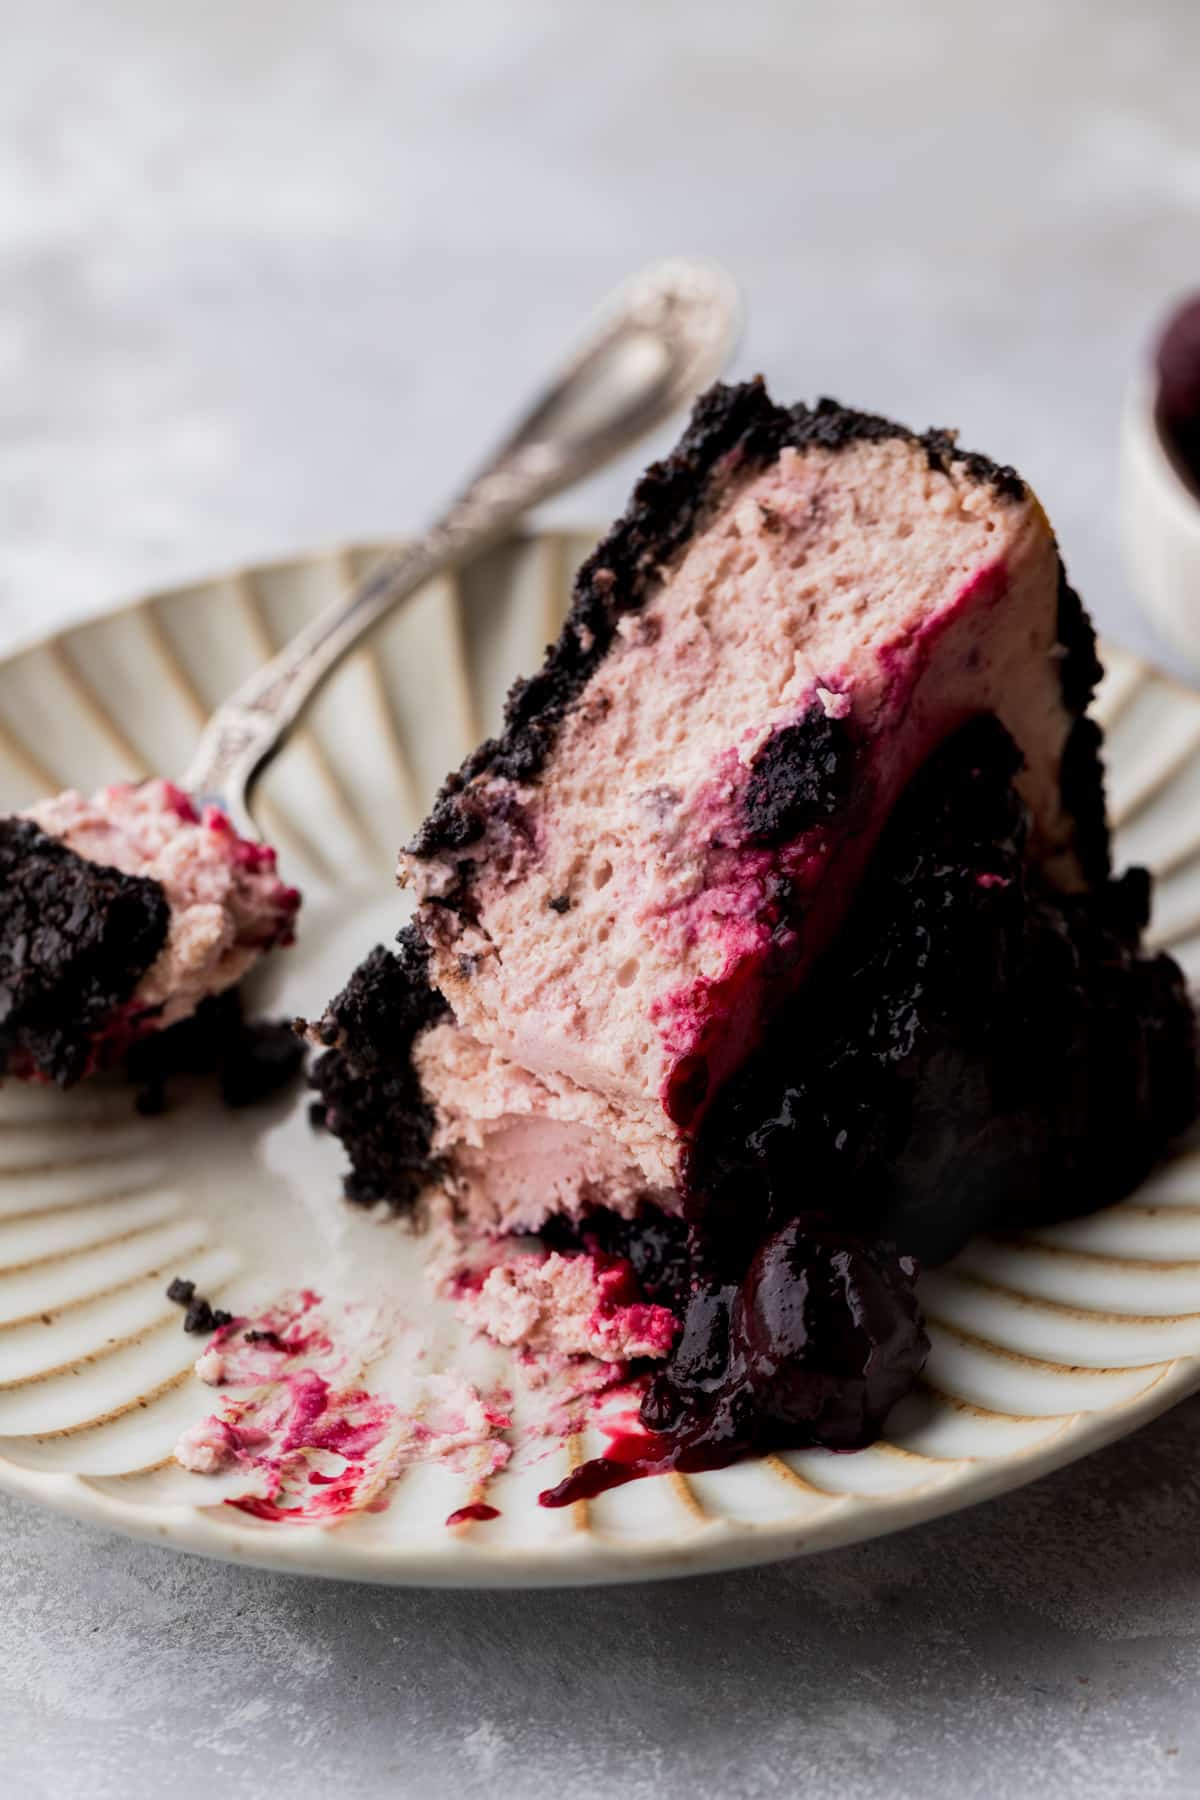
Next, pour the cherry topping on top of your cheesecake. Smooth the topping over the cheesecake with an offset spatula to get an even layer.
Save this Recipe!
Water Bath Tips
The water bath provides a moist environment for the cheesecake. This is because of the steam. When it is too dry, it will create cracks in the cheesecake.
Here are two techniques to try. They both use a roasting pan with hot steaming water.
- Place the springform pan inside a 10 inch cake pan. Place the cake pan in the roasting pan. Fill the pan with the hot water (about halfway up the cake pan)
- Wrap the springform pan with foil twice very tightly. Place the springform pan inside the roasting pan. Fill the pan halfway up with hot water.
My favorite method is the first one. This won’t let any water at all get into the crust. It makes baking cheesecake so easy!
The second option gives the chance to get water inside and create a soggy crust.
Preventing Cheesecake Cracks
Beat the wet ingredients minus the eggs on high speed. Everything need to be super creamy and smooth. Chunks of cream cheese can cause cracks.
Add eggs on low speed. The goal is to have as little air as possible when mixing the eggs. Too much air can cause big bubbles in the cheesecake batter. It will make the cheesecake rise and fall too quickly when baking. Which causes cracks.
Use a water bath. This is essential! See below for cheesecake tips.
Cool the cheesecake. Once the cheesecake is done baking, it needs to sit in the hot oven for 30 minutes. This lets it cool slowly.
If you were to put the cheesecake on the counter right after done baking, it will be too quick of a temperature change, which cause cracks.
How To Easily Remove The Cheesecake From The Pan
First, spray the springform pan with baking non stick spray. Next, line the bottom of the pan with 9 inch parchment paper circle. Make sure to spray the pan again.
Then, after the cheesecake has chilled overnight. The springform pan should pop right off. If it doesn’t very gently use a knife around the edge of the cheesecake to pop it off.
Then, you should be able to lay the cheesecake on it’s side to take off the bottom of pan and the parchment circle.
FAQ
Divide this recipe into thirds to make 12 mini cheesecake. Bake in a muffin pan for 18-20 minutes. Follow this Mini Oreo Cheesecakes for detailed instructions for mini cheesecakes.
You can halve the recipe to make these into cheesecake bars using 8X8 or 9X9 inch baking pan (use 16 oz of cream cheese). You can also use a 8 inch springform pan. If you want to use a 6 inch springform pan, half the recipe, but use 16 oz of cream cheese.
First, make sure the cheesecake is very cold. Then, use a sharp knife to cut the slices. Clean the knife after every slice.
Recipe Variation
- You can top the cheesecake with canned cherry pie filling to save time.
- You can also choose to make a plain cheesecake and all the cherries on top.
Special Tools
- Springform pan: I use a good quality 9-inch springform pan. Sometimes I will use an 8-inch springform pan if I want a taller cheesecake.
- Parchment paper circles: I used 8-inch parchment paper circles for the bottom of the pan. I love to use the premade circles, so I don’t have to cut it out of regular parchment paper.
- Baking spray: I use the nonstick spray that has flour in it.
- Offset spatula: I use this to easily spread the frosting or fillings.
Storing and Freezing
Store this cherry cheesecake in the fridge in an airtight container like a cake carrier. Chill up to 5 days.
Freezing
You can freeze the cherry cheesecake in individual slices. Store in an airtight container and freeze up to 30 days. Thaw for 1-2 hours before eating.
You can also freeze the cheesecake before decorating. Wrap the cooled cheesecake (it needs to chill in the fridge overnight first), in plastic wrap and freeze up to 30 days.
Thaw for 1-2 hours before decorating.
Other Cheesecake Recipes To Try
Try These Christmas Recipes
- Gingerbread cheesecake
- Mini gingerbread cheesecake
- Toblerone cheesecake
- Chocolate truffle cake
- Grinch cookies
Make sure to leave a STAR REVIEW if you loved this recipe! Make sure to tag me on Instagram @stephaniesweettreats. To get more ideas follow me on Pinterest.
Cherry Cheesecake
Ingredients
Oreo Crust
- 2 1/2 cups Oreo crumbs, keep the filling!
- 4 TBSP Unsalted butter, melted
Cherry Topping
- 1 lb Cherries, fresh or frozen pitted cherries
- 1/2 cup White granulated sugar
- 2 TBSP Cornstarch
Cherry Cheesecake
- 24 oz Cream cheese, room temperature
- 3/4 cup White granulated sugar
- 1/2 cup Sour cream, room temperature
- 1/4 cup Cherry filling pureed, see instructions
- 1 tsp Pure vanilla extract
- 4 Large eggs, room temperature
Instructions
Oreo Crust
- Preheat the oven to 325°F. Spray a 9-inch springform pan with baking nonstick spray. Line the bottom of the pan with a 9-inch parchment paper circle. Spray again.
- Use a food processor/ blender to blend the Oreos into a fine crumb. In a small bowl mix the Oreo crumbs and melted butter with a fork.2 1/2 cups Oreo crumbs, 4 TBSP Unsalted butter
- Pour the crumbs into the pan. Use your hands to press the crust up the sides of the pan. Use the bottom of a measuring cup to compact the crust.
- Bake for 12 minutes.
Cherry Topping
- In a medium saucepan, mix the cherries, sugar, and cornstarch. Heat on medium heat until the juice starts to separate.1 lb Cherries, 1/2 cup White granulated sugar, 2 TBSP Cornstarch
- Lightly mash half of the cherries and let it cook until it thickens slightly.
- Take a 1/2 cup of the cherry topping. Blend in the blender into a puree, it will be 1/4 cup of pureed cherry topping. Place in the freezer to cool before putting in the cheesecake batter. (About 15 minutes in the freezer.)
- Place the rest of the cherry topping in an airtight container in the fridge.
Cherry Cheesecake
- Using a mixer, beat the cream cheese and sugar on high speed for 2 minutes. Scrape the bowl.24 oz Cream cheese, 3/4 cup White granulated sugar
- Add the sour cream, cherry puree, and vanilla extract and mix on medium speed. Then, add in the 4 eggs and mix on low speed until just combined. The batter will be a light pink color.1/2 cup Sour cream, 1/4 cup Cherry filling pureed, 1 tsp Pure vanilla extract, 4 Large eggs
- Pour the batter into the oreo crust. Prepare the water bath.
- Water bath. Use one of these methods for a water bath. Both methods use a large roasting pan and hot steaming water.1. Place the springform pan in a 10 inch cake pan. Place the cake pan in the roasting pan and fill with hot water halfway up the cake pan. This method prevent water getting into the crust.2. Wrap the springform pan tightly twice in aluminum foil. Place the springform pan inside the roasting pan. Fill with hot water halfway up the springform pan. This method works great, but can sometimes leak water into the crust.
- Bake for 70-80 minutes until the edges are set and the middle has a slight jiggle.
- Turn off the oven, crack open the door, and let the cheesecake slowly cool for 30 minutes. Then, transfer the springform pan to a cooling rack to cool completely.
- Cover the pan with foil and chill overnight or at least 6 hours.
- Take the pan and parchment paper off of the cheesecake. Pour the cherry topping on top of the cheesecake and serve.