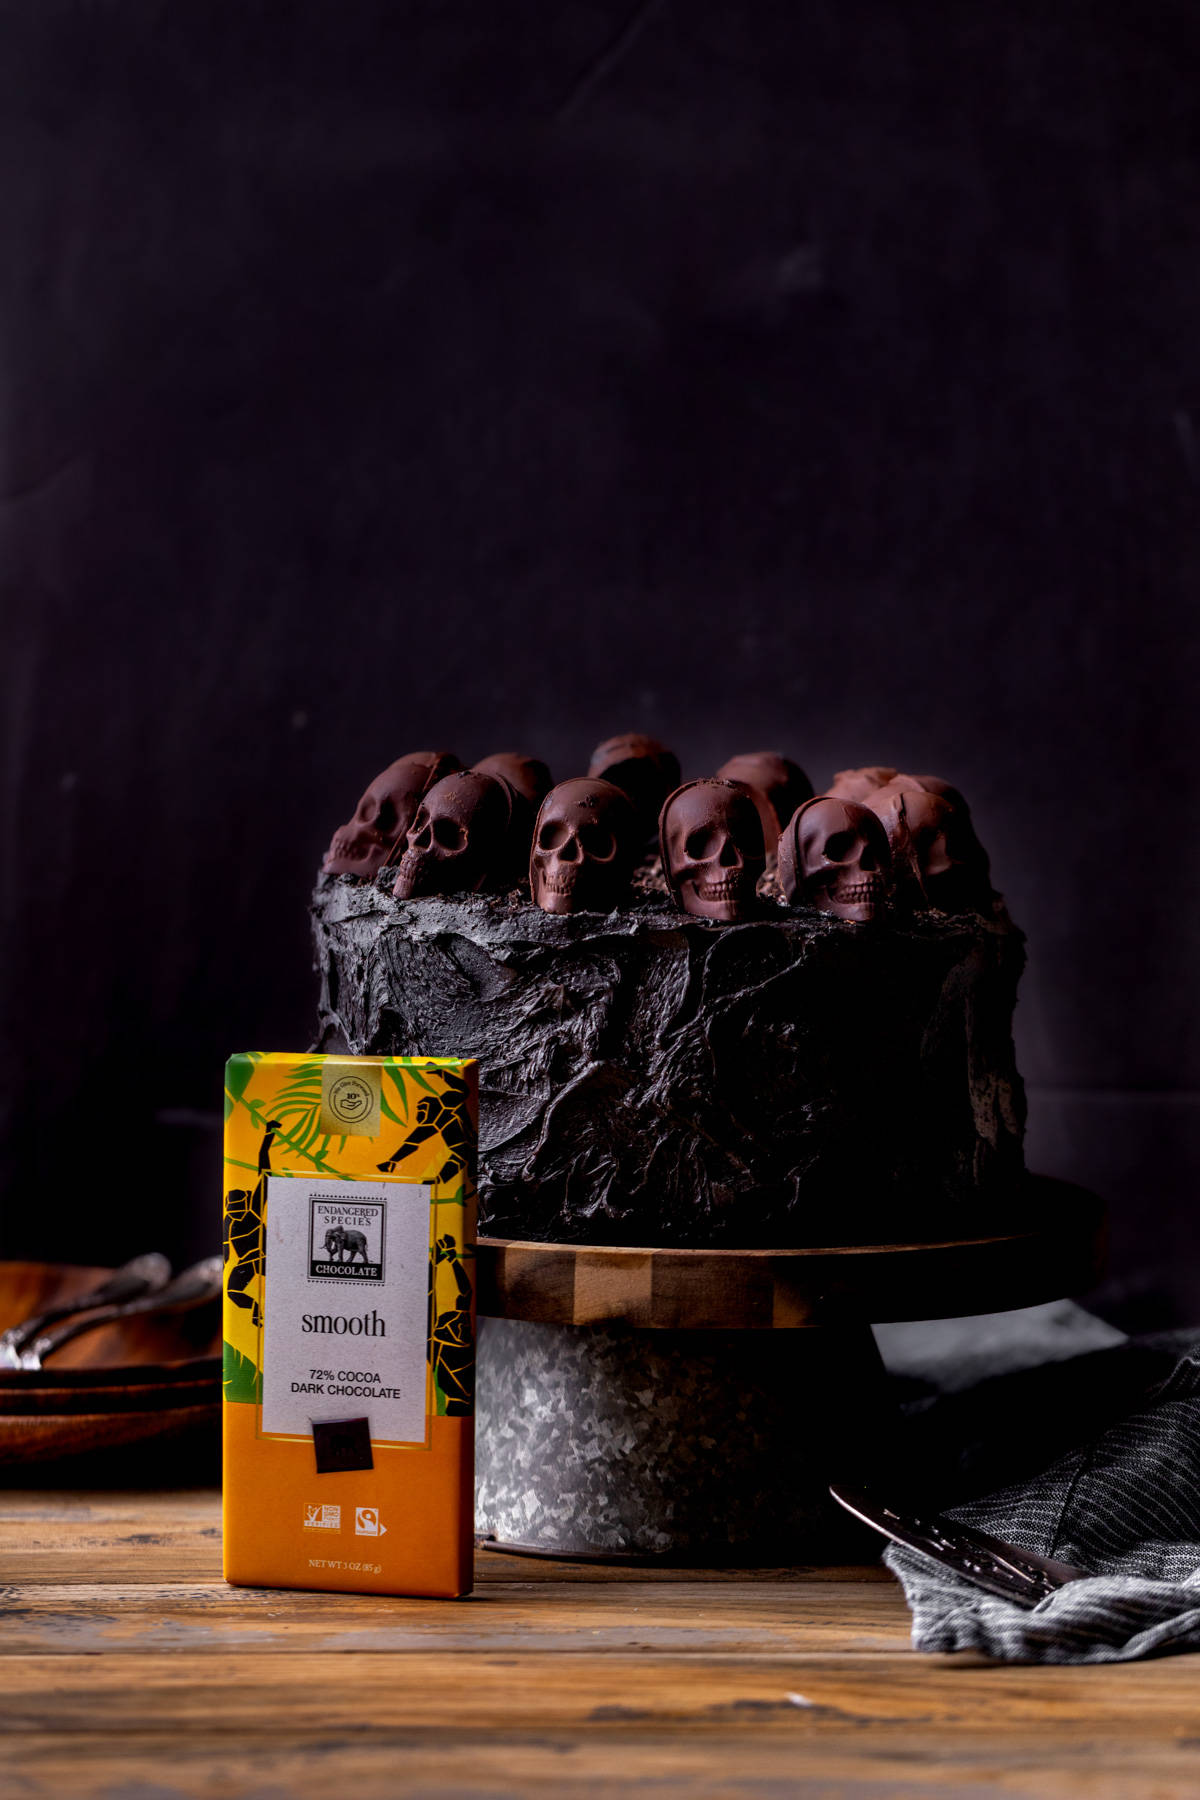
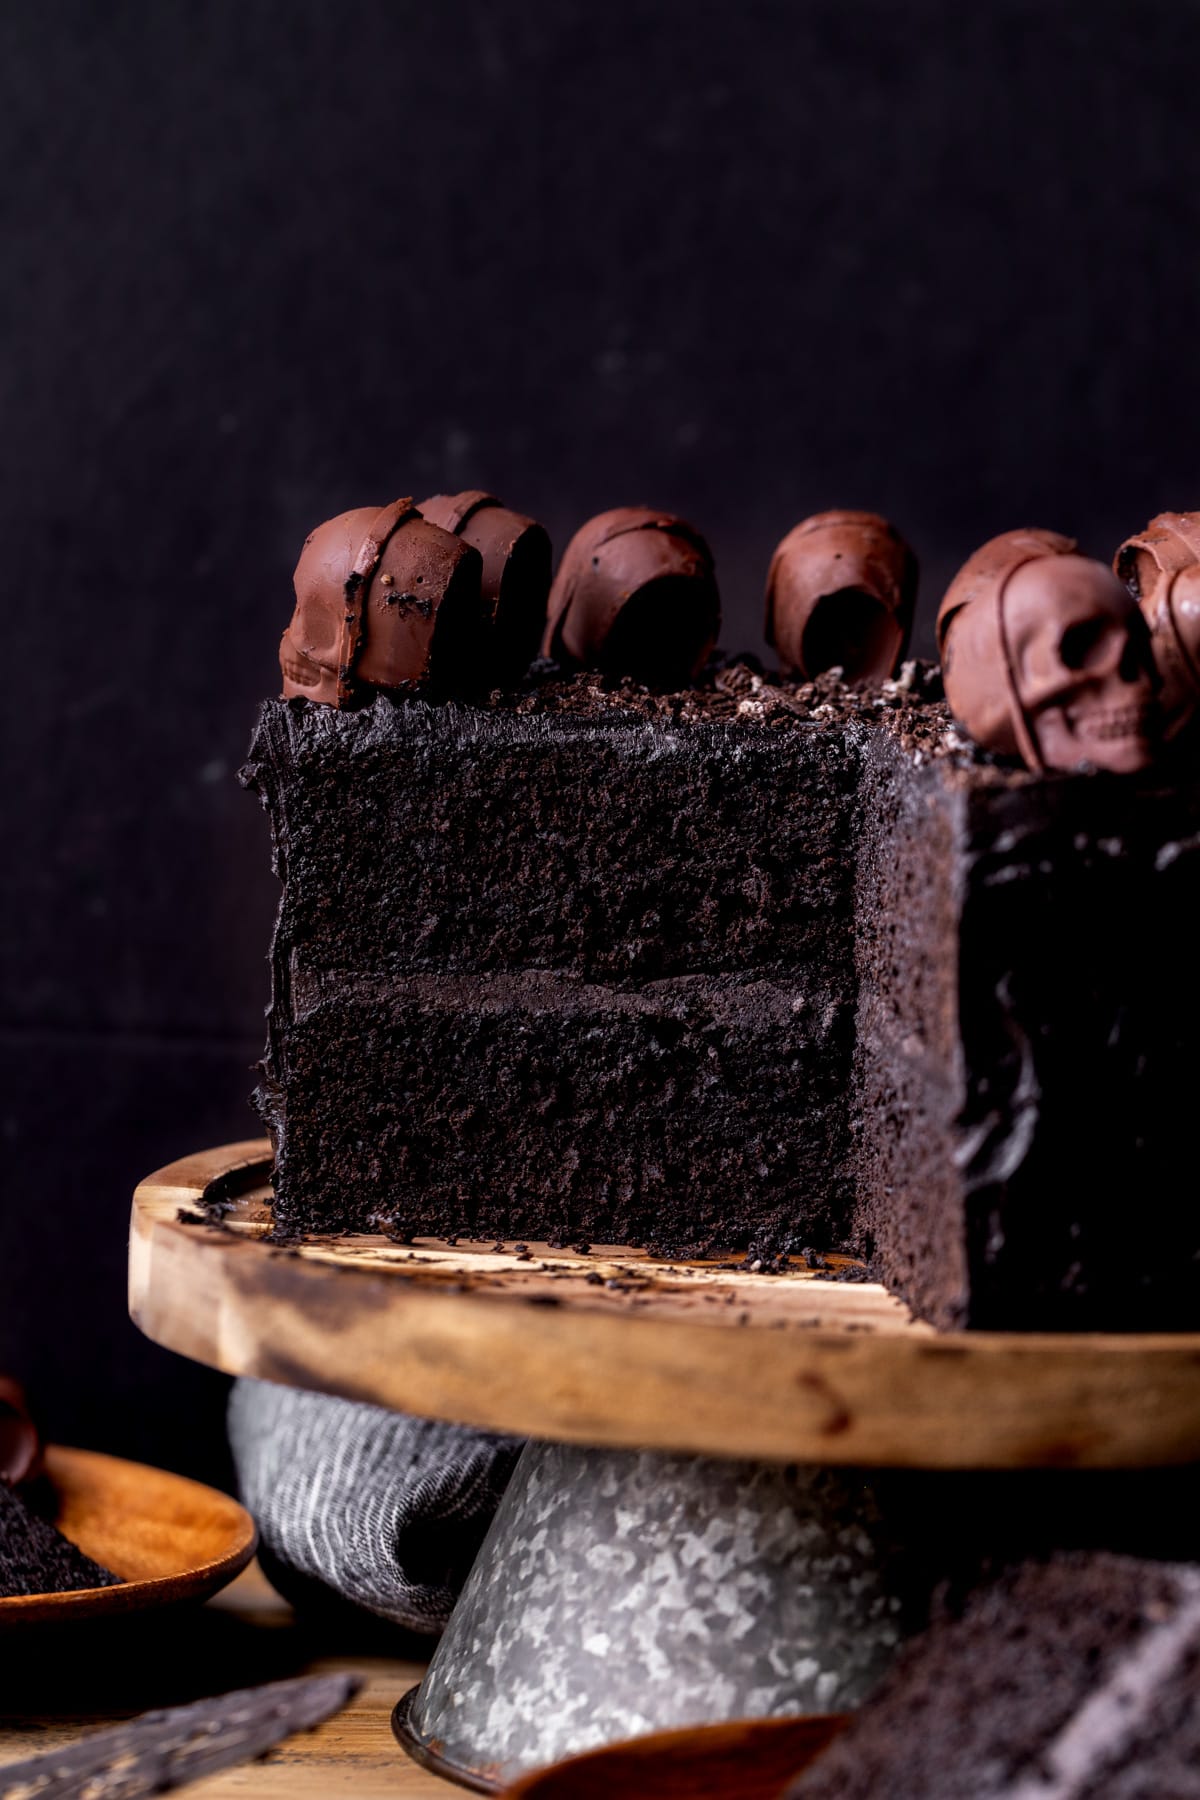
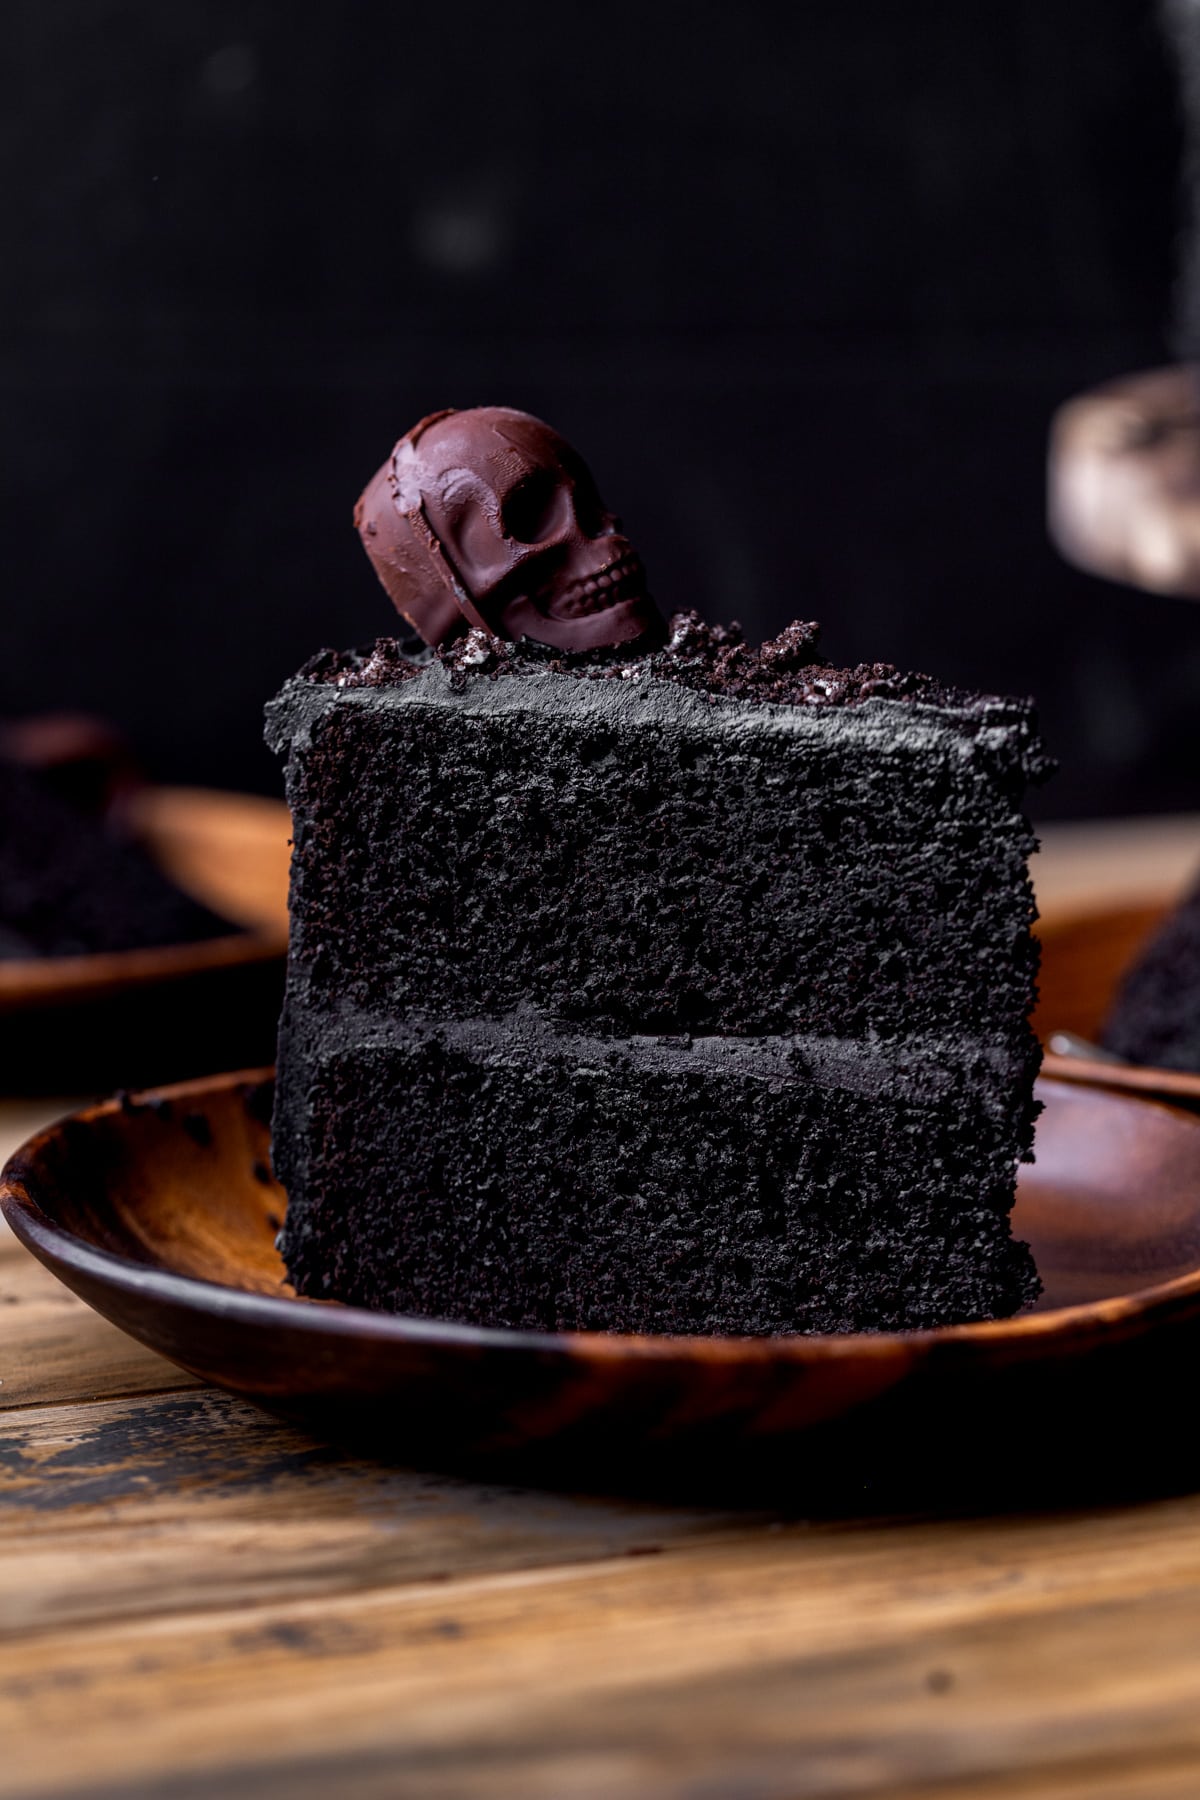
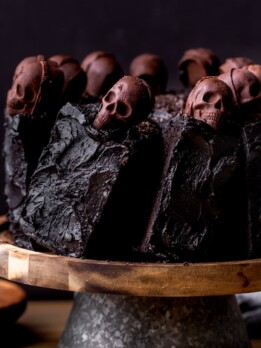
Halloween Chocolate Cake

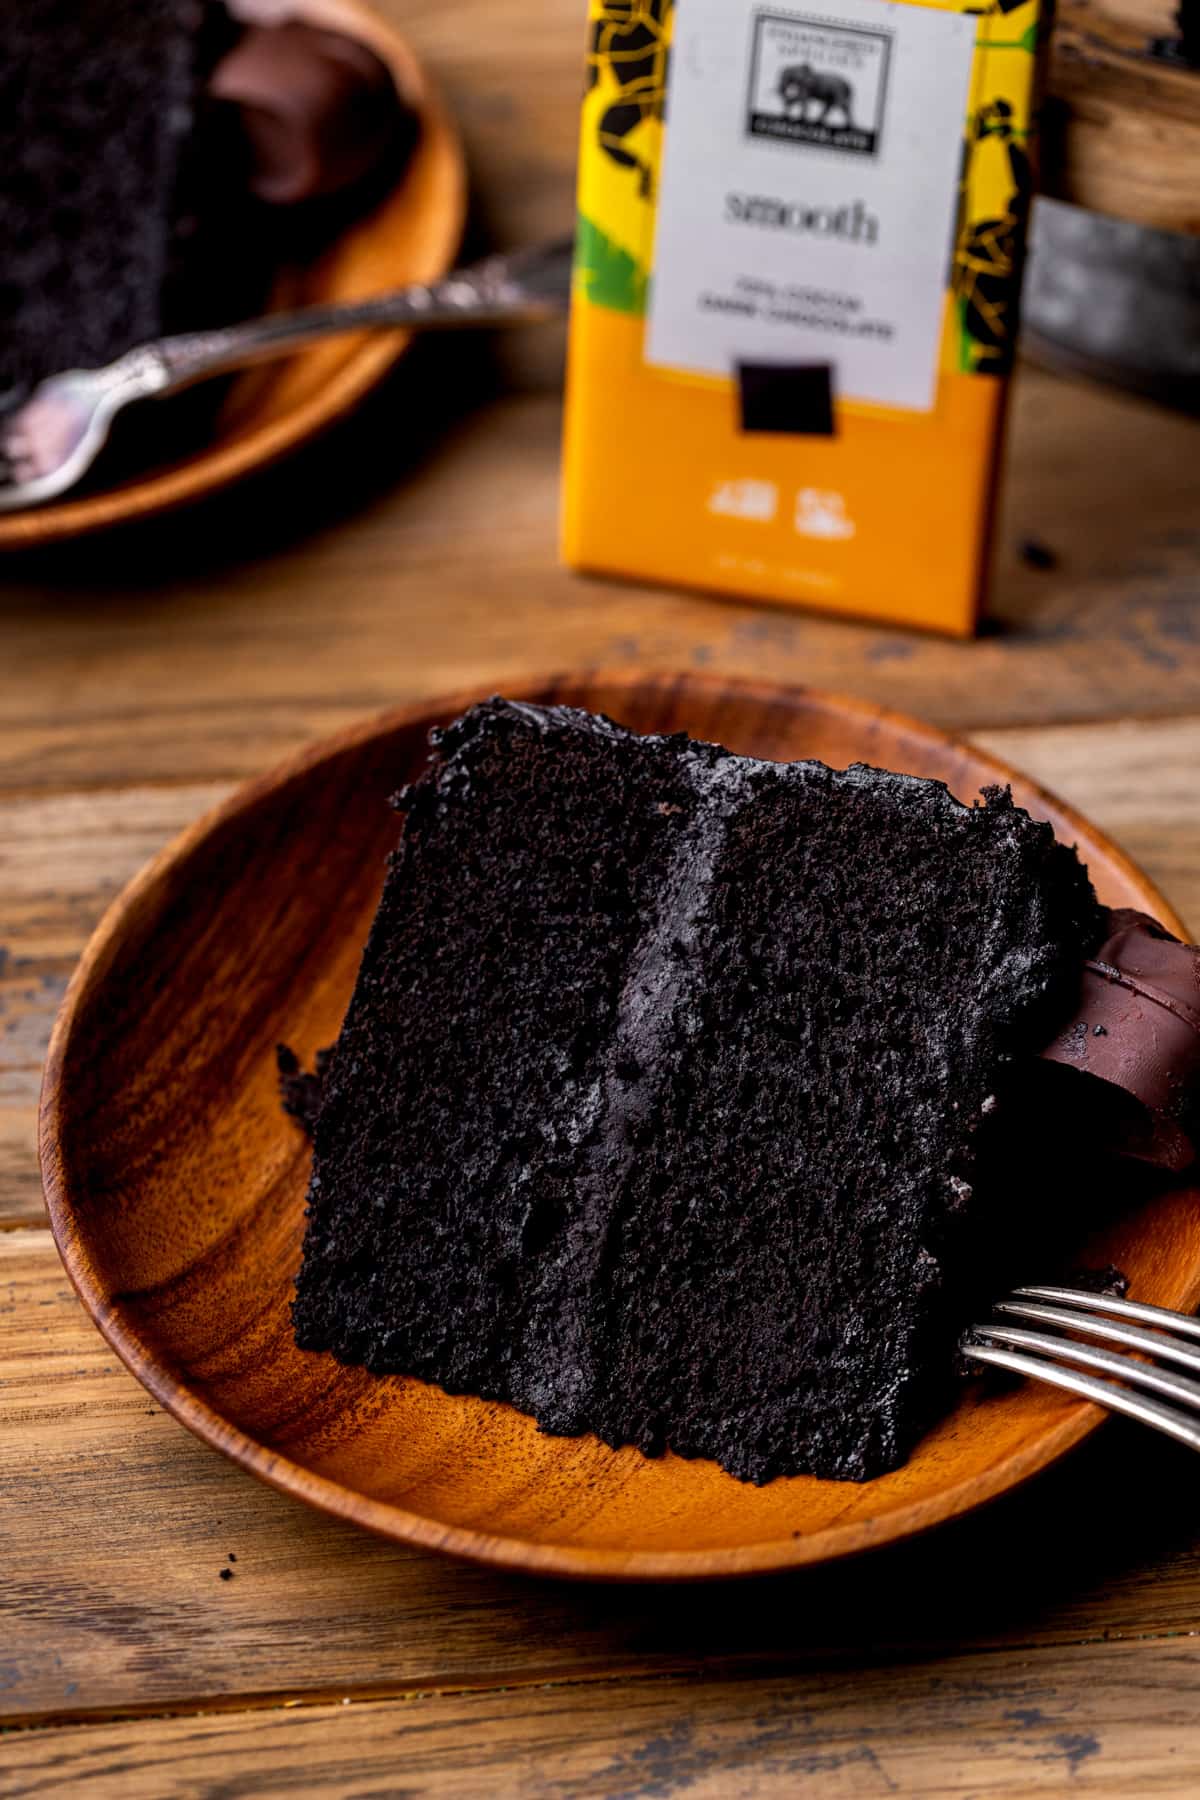
This Halloween chocolate cake is a two layer black velvet chocolate cake. It is filled with black cocoa buttercream and topped with chocolate skulls. It is the perfect cake for a Halloween party if you love chocolate!
This post is sponsored by Endangered Species Chocolate and all thoughts and opinions are my own. Thank you for supporting the brands that make Stephanie’s Sweet Treats possible!

This Halloween chocolate cake is a delicious black velvet cake, which means it uses black cocoa for a less bitter chocolate flavor. Combined with the chocolate buttercream it has a rich chocolate flavor throughout. Once you taste this cake it will be your new favorite chocolate cake, I promise!
For other chocolate dessert recipes, try Chocolate Cheesecake Bars, Chocolate Glazed Donuts, Chocolate Cinnamon Rolls.
Why This Halloween Layer Cake Recipe Works
- Easy recipe- This easy chocolate cake recipe uses black cocoa, but otherwise has no more steps than any other simple chocolate cake. It tastes SO much better than other simple cakes, though!
- Chocolate- This cake celebrates chocolate all the way through. The melted chocolate in the cake batter gives it an extra strong chocolate flavor and the black chocolate frosting gives you that delicious chocolate flavor in every bite.
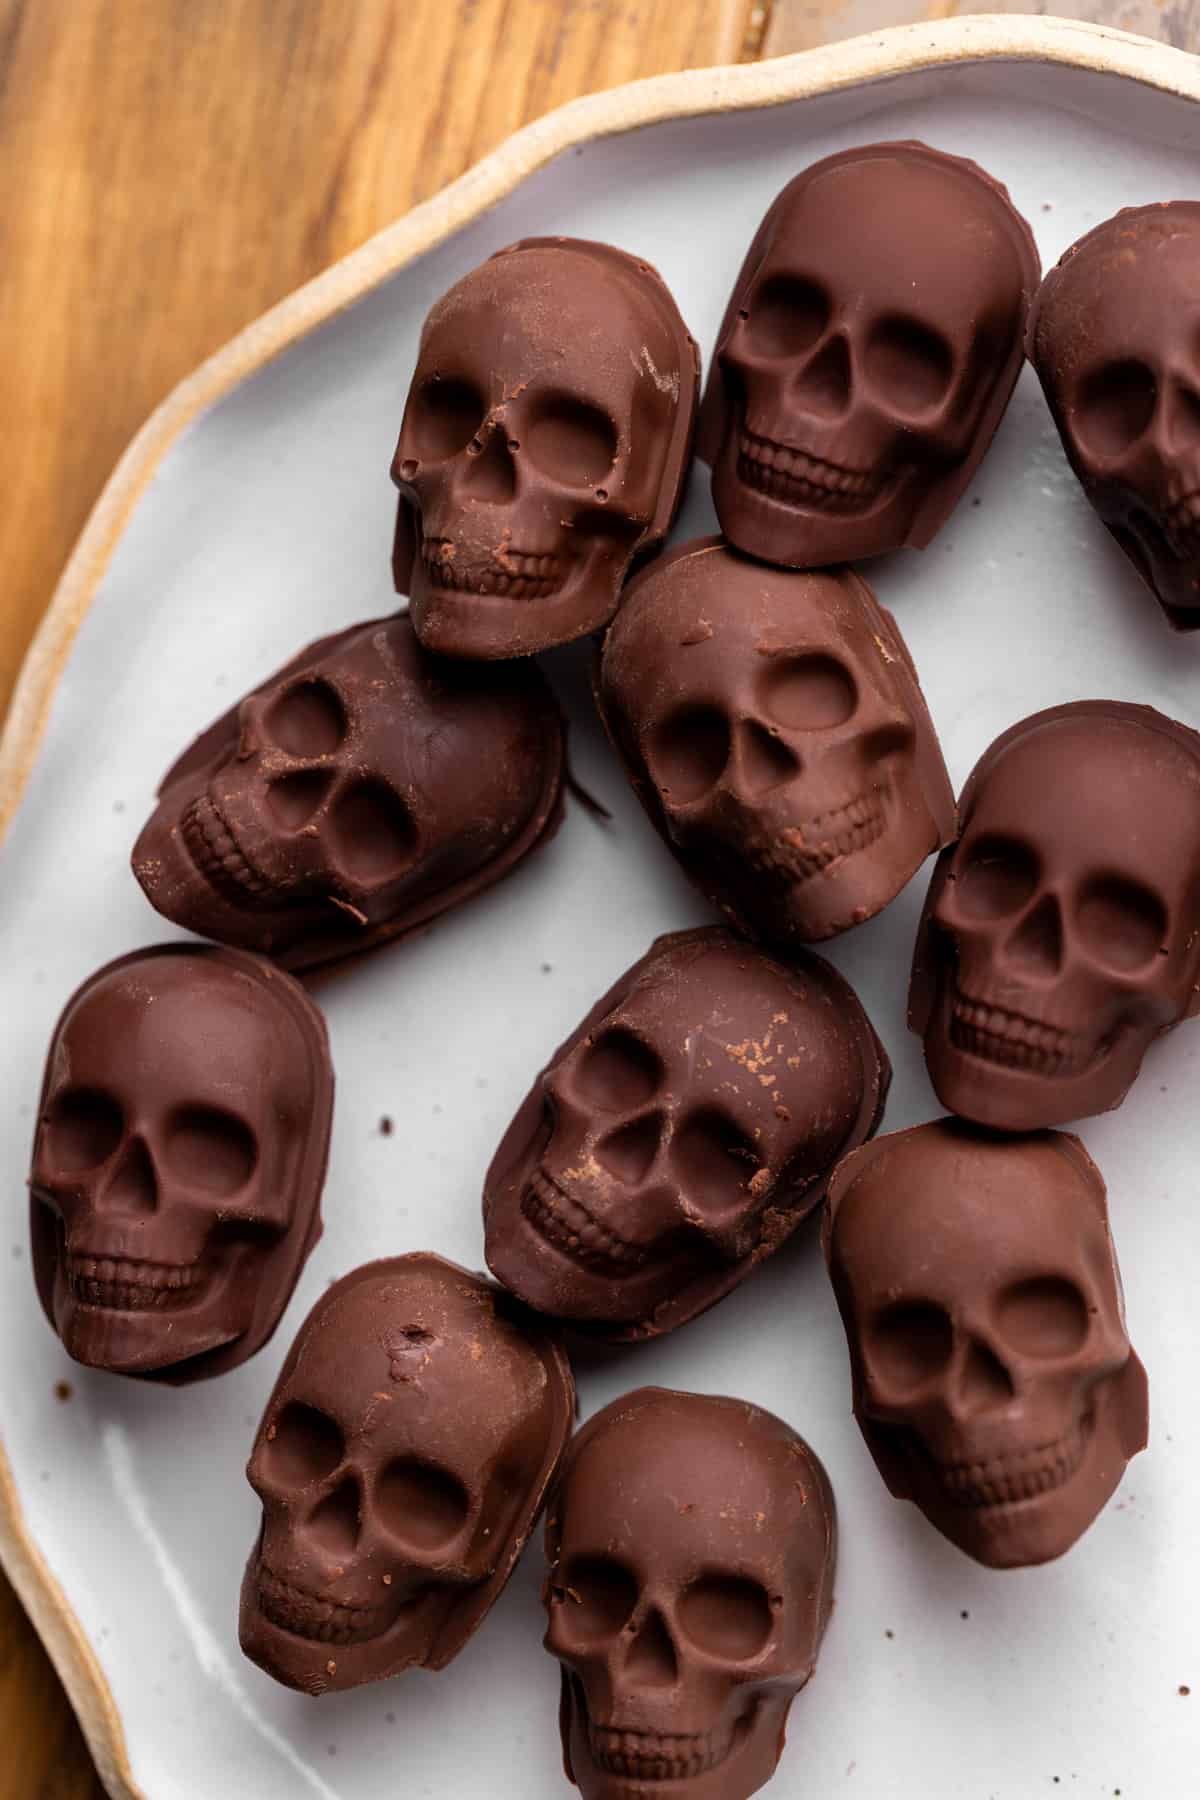
- Spooky cake- This black cake with chocolate skulls on top has that spooky look you want for Halloween parties!
The Best Chocolate To Use
The Endangered Species Chocolate Smooth 72% chocolate bars are perfect for this recipe. They have a rich dark chocolate flavor and a silky smooth texture that melts into a batter perfectly. The best part is of working with Endangered Species Chocolate is that I know I am supporting a good cause.
They pay premiums to make sure their chocolate, which is made in America, uses fair trade cocoa that can be traced back to fair trade farms in West Africa! Their natural ingredients are selected for their quality and sustainability for an ideal taste. They even pay forward 10% of profits to organizations that support conservation efforts to help save our wildlife!
Endangered Species Chocolate is all certified Fair Trade, Gluten Free, and non-GMO. There are even a plethora of vegan options and flavors!
Ingredient Notes for Chocolate Halloween Cake
Here are some notes on the ingredients. For a full list of ingredients, check out the recipe card below.
- Chocolate- For the cake batter I used Endangered Species Chocolate Smooth 72% chocolate bars. They melt into a very smooth and delicious chocolate that is great for baking.
For the decorations I used Endangered Species Chocolate Milk Chocolate. - Unsalted butter- Pull this out 2 hours before baking.
- Oil- Use canola oil, vegetable oil, or olive oil.
- Eggs- Pull the large eggs out 2 hours before baking to get to room temperature.
- Buttermilk- Use full fat or reduced fat buttermilk. Pull this out 2 hours before baking.
- Powdered sugar- Make sure this is sifted to avoid gritty frosting.
Ingredient Substitutions
- Dairy free- You can use your favorite dairy free options for this recipe!
- Gluten free- I haven’t tested this gluten free. Let me know if you do.
- Buttermilk- You can also do 1 cup of milk with 1 Tablespoon of white vinegar or lemon juice. Let it sit for 10 minutes before using.
Step By Step Instructions – Black Velvet Cake Layers
Here is how to make and bake the cake layers for the Halloween chocolate cake.
STEP 1: Prep. Preheat the oven to 350°F. Spray two 8-inch cake pans with baking spray. Line the bottom of the pans with a parchment paper circle and spray again.
STEP 2: Dry ingredients. Sift the all purpose flour together with black cocoa powder, sugar, baking powder, baking soda, and salt in a large bowl. Set it aside.
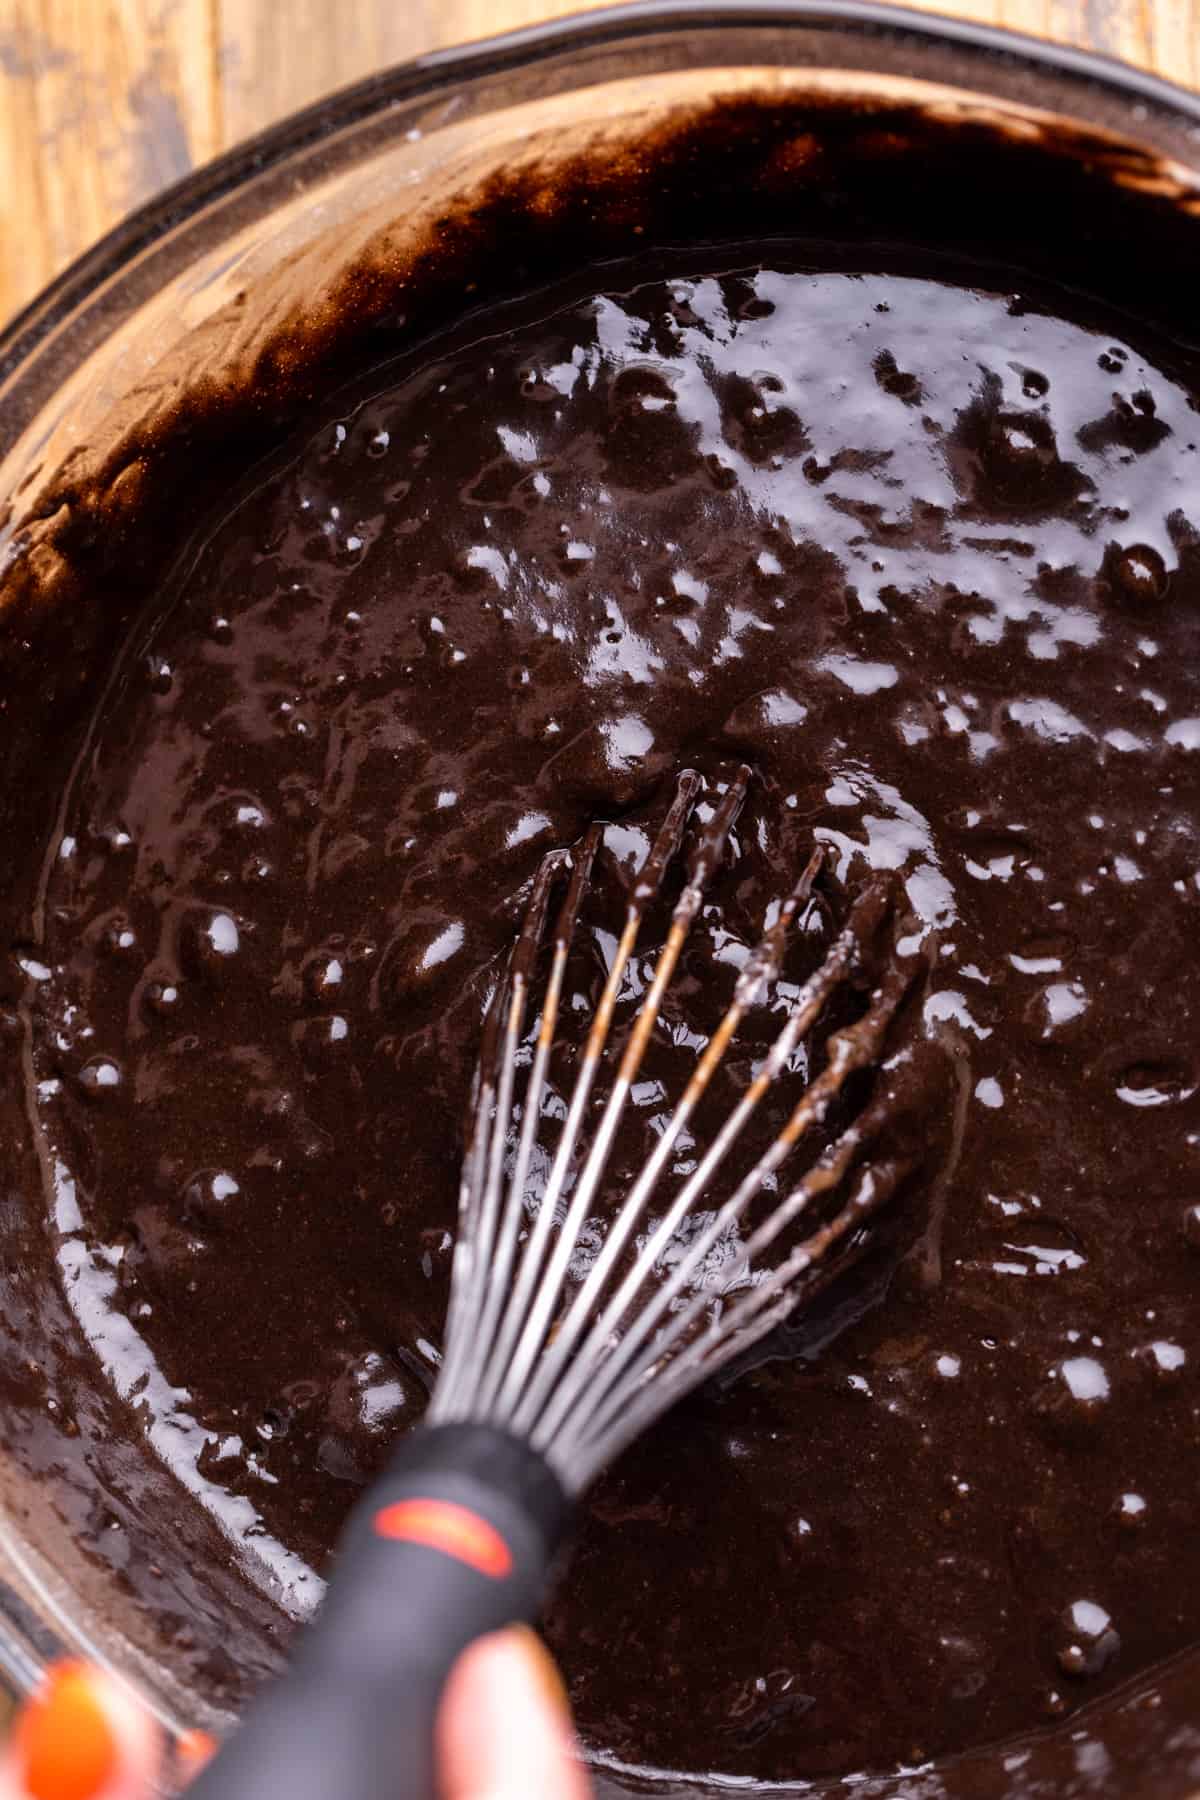
STEP 3: Wet ingredients. In a separate bowl, mix the oil, vanilla extract, eggs, melted chocolate, and buttermilk together until combined. Add a few drops of black food dye and mix it in.
STEP 4: Combine. Pour the hot water into the wet ingredients slowly while mixing. Pour the wet ingredients into the dry and mix until it is just combined.

STEP 5: Pour. Pour the batter into the two cake pans divided equally.
STEP 6: Bake. Bake the cakes for 30-34 minutes. It is done when a toothpick inserted into the center of the cake comes out clean.
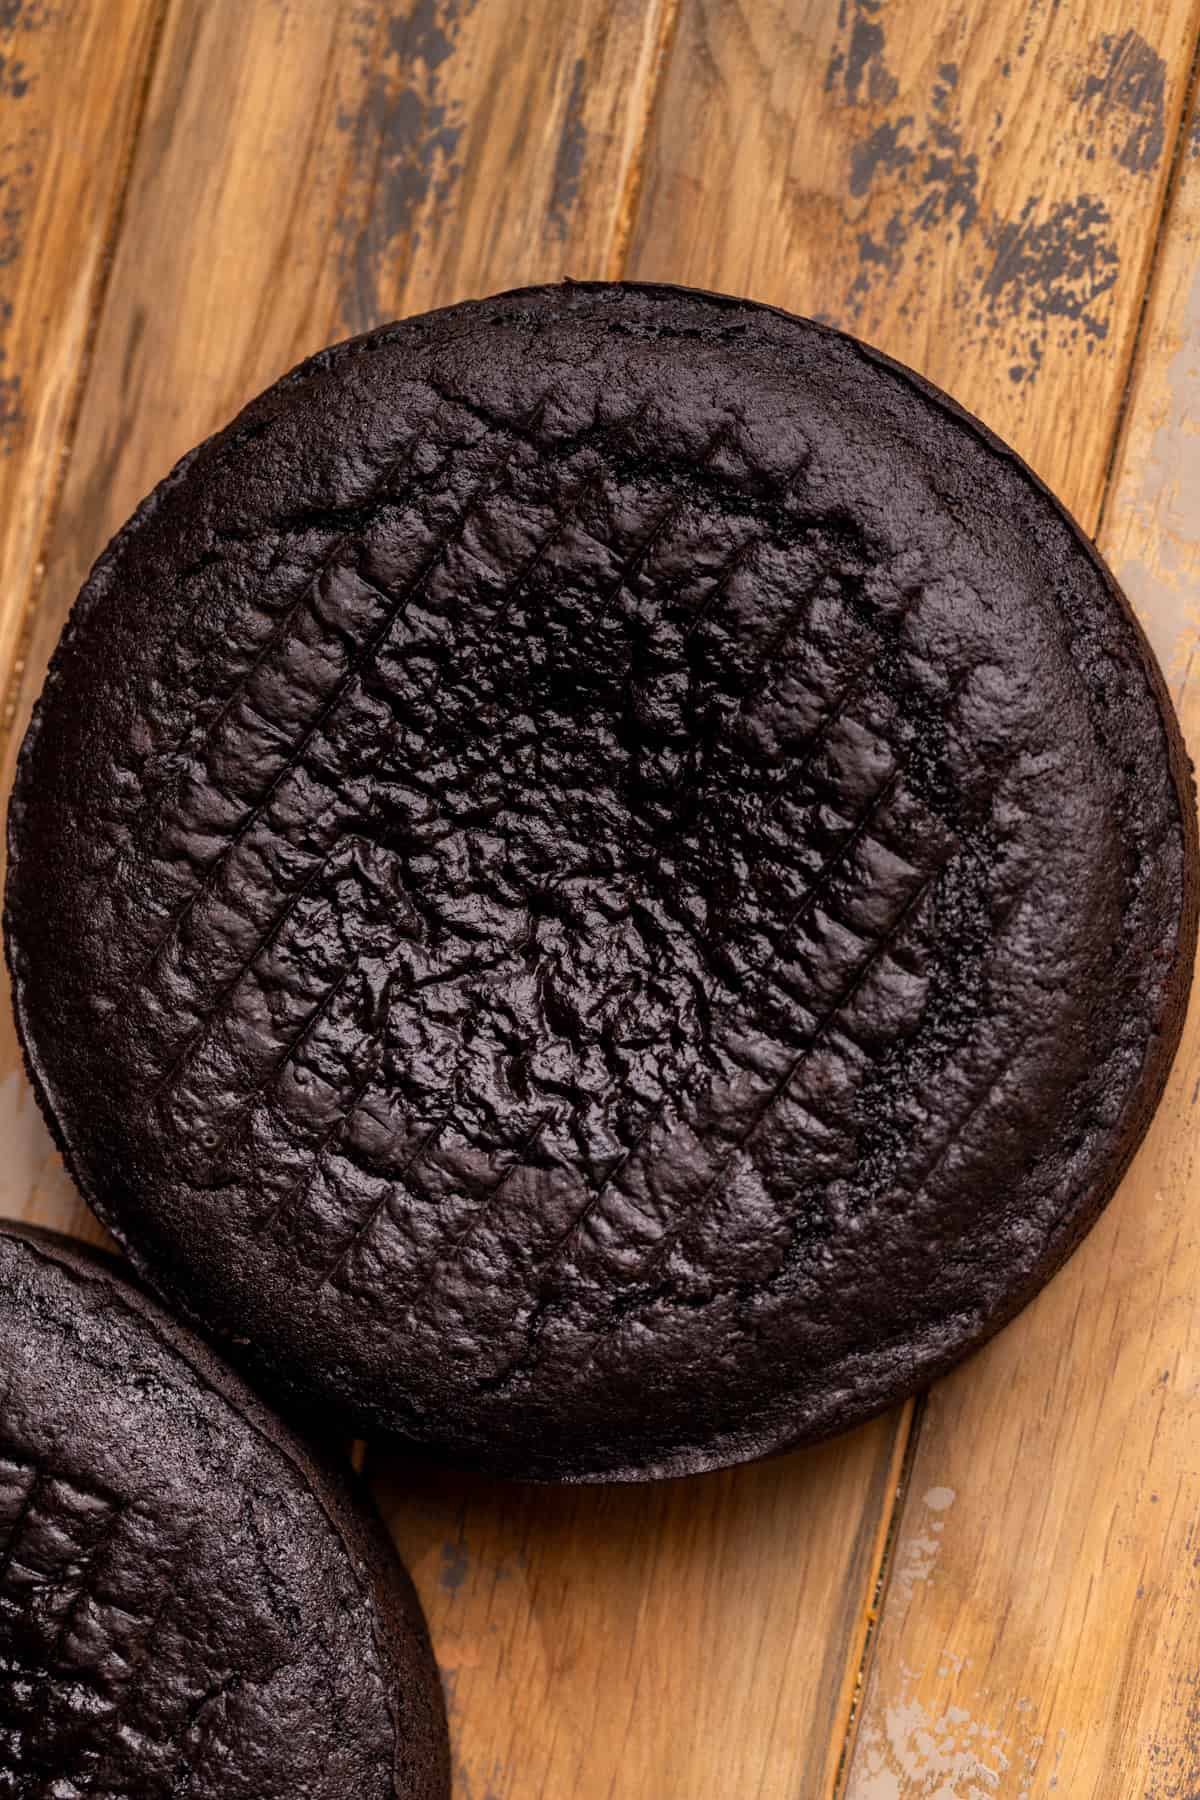
STEP 7: Cool. Let the cakes cool in the hot pans for 10 minutes before transferring them to a cooling rack to cool completely.
Step By Step Instructions – Black Frosting
Here is how to make the black frosting and decorate the Halloween cake.
Save this Recipe!
STEP 1: Dry ingredients. Sift the powdered sugar and black cocoa powder together in a large mixing bowl.
STEP 2: Beat butter. Use a mixer to beat the butter on high speed for 3 minutes. Scrape the sides of the bowl with a spatula.
STEP 3: Combine. Add half of the powdered sugar to the butter mixture and mix on low speed until combined. Then, add the rest of the powdered sugar and mix. Next, add the vanilla extract, salt, and a few drops of black food dye.
STEP 4: Beat frosting. Mix on high speed for 2 minutes until the frosting is creamy.
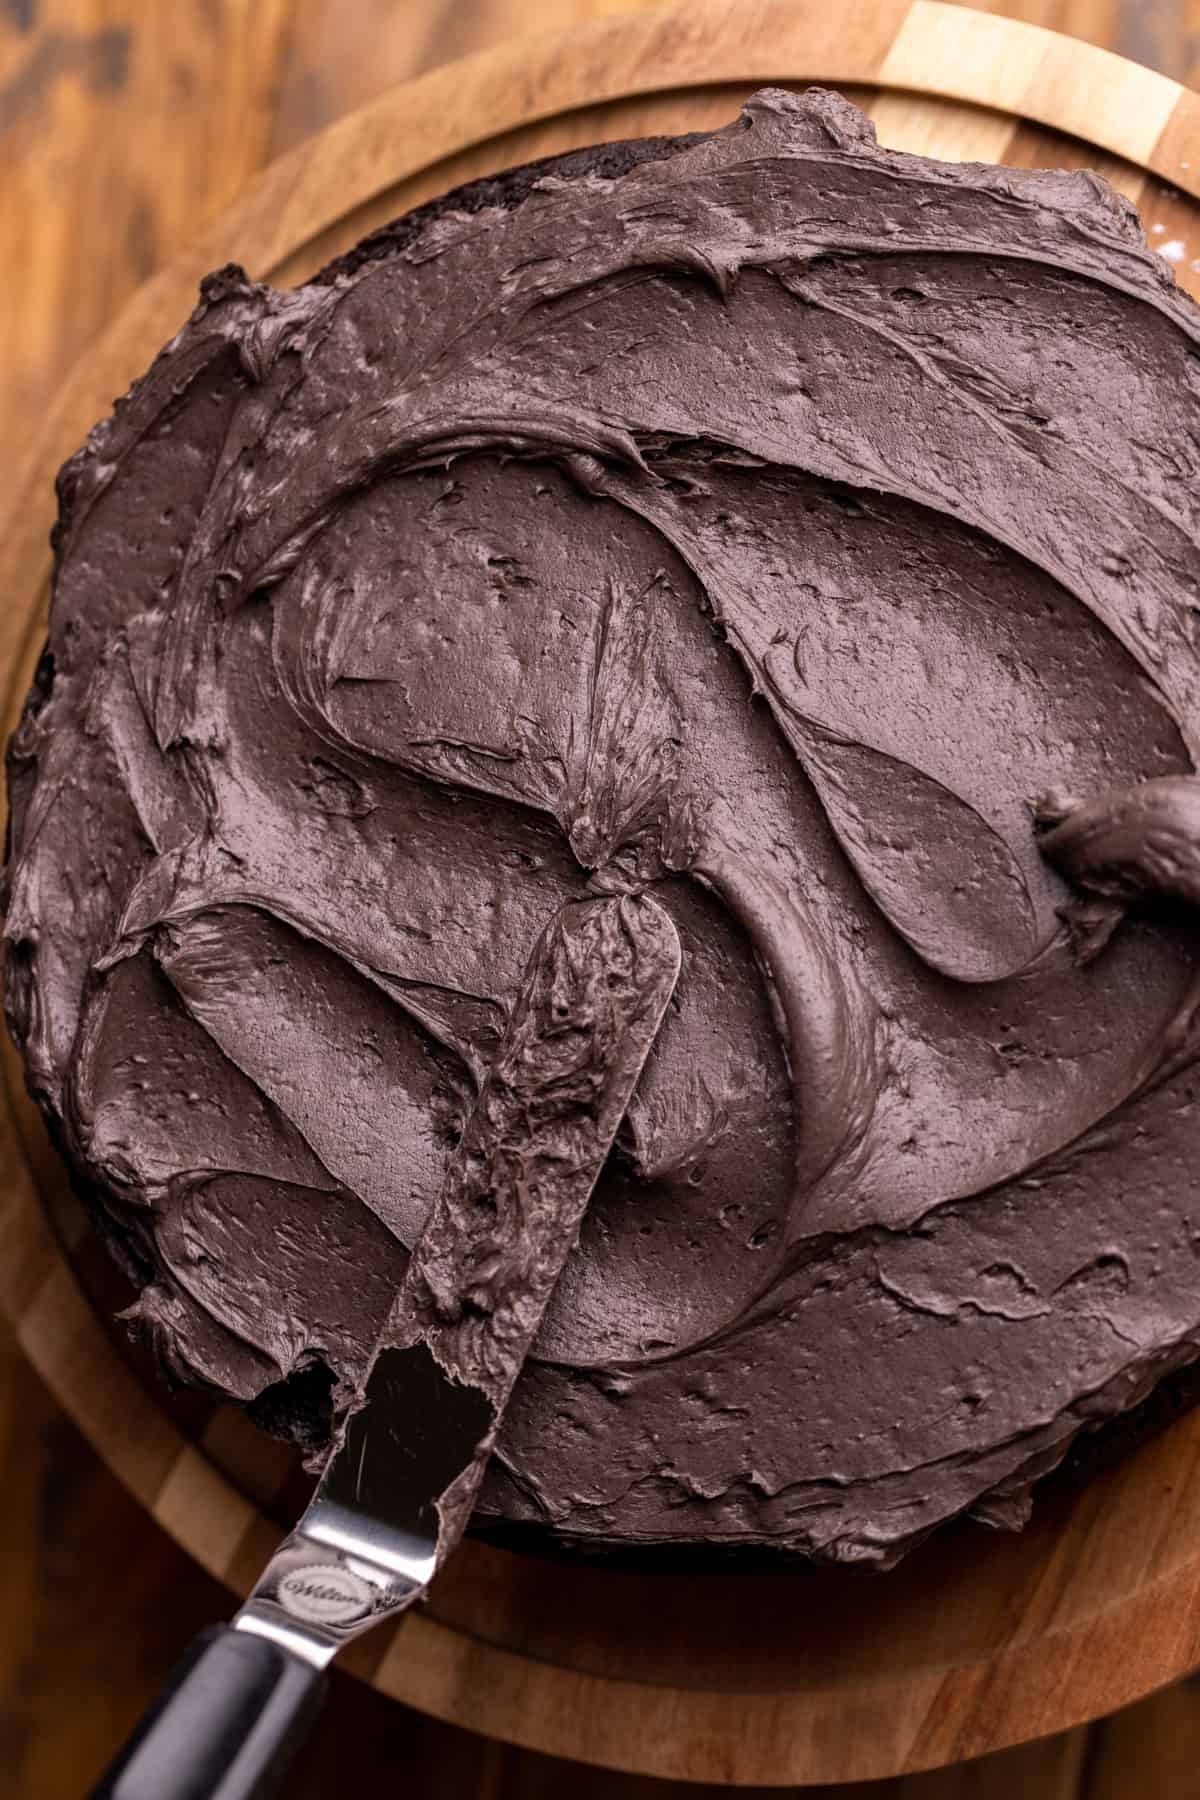
STEP 5: Place layers. Place the first layer of the cake down and spread 1 cup of frosting over it. Place the second layer on top with the flat bottom on top.
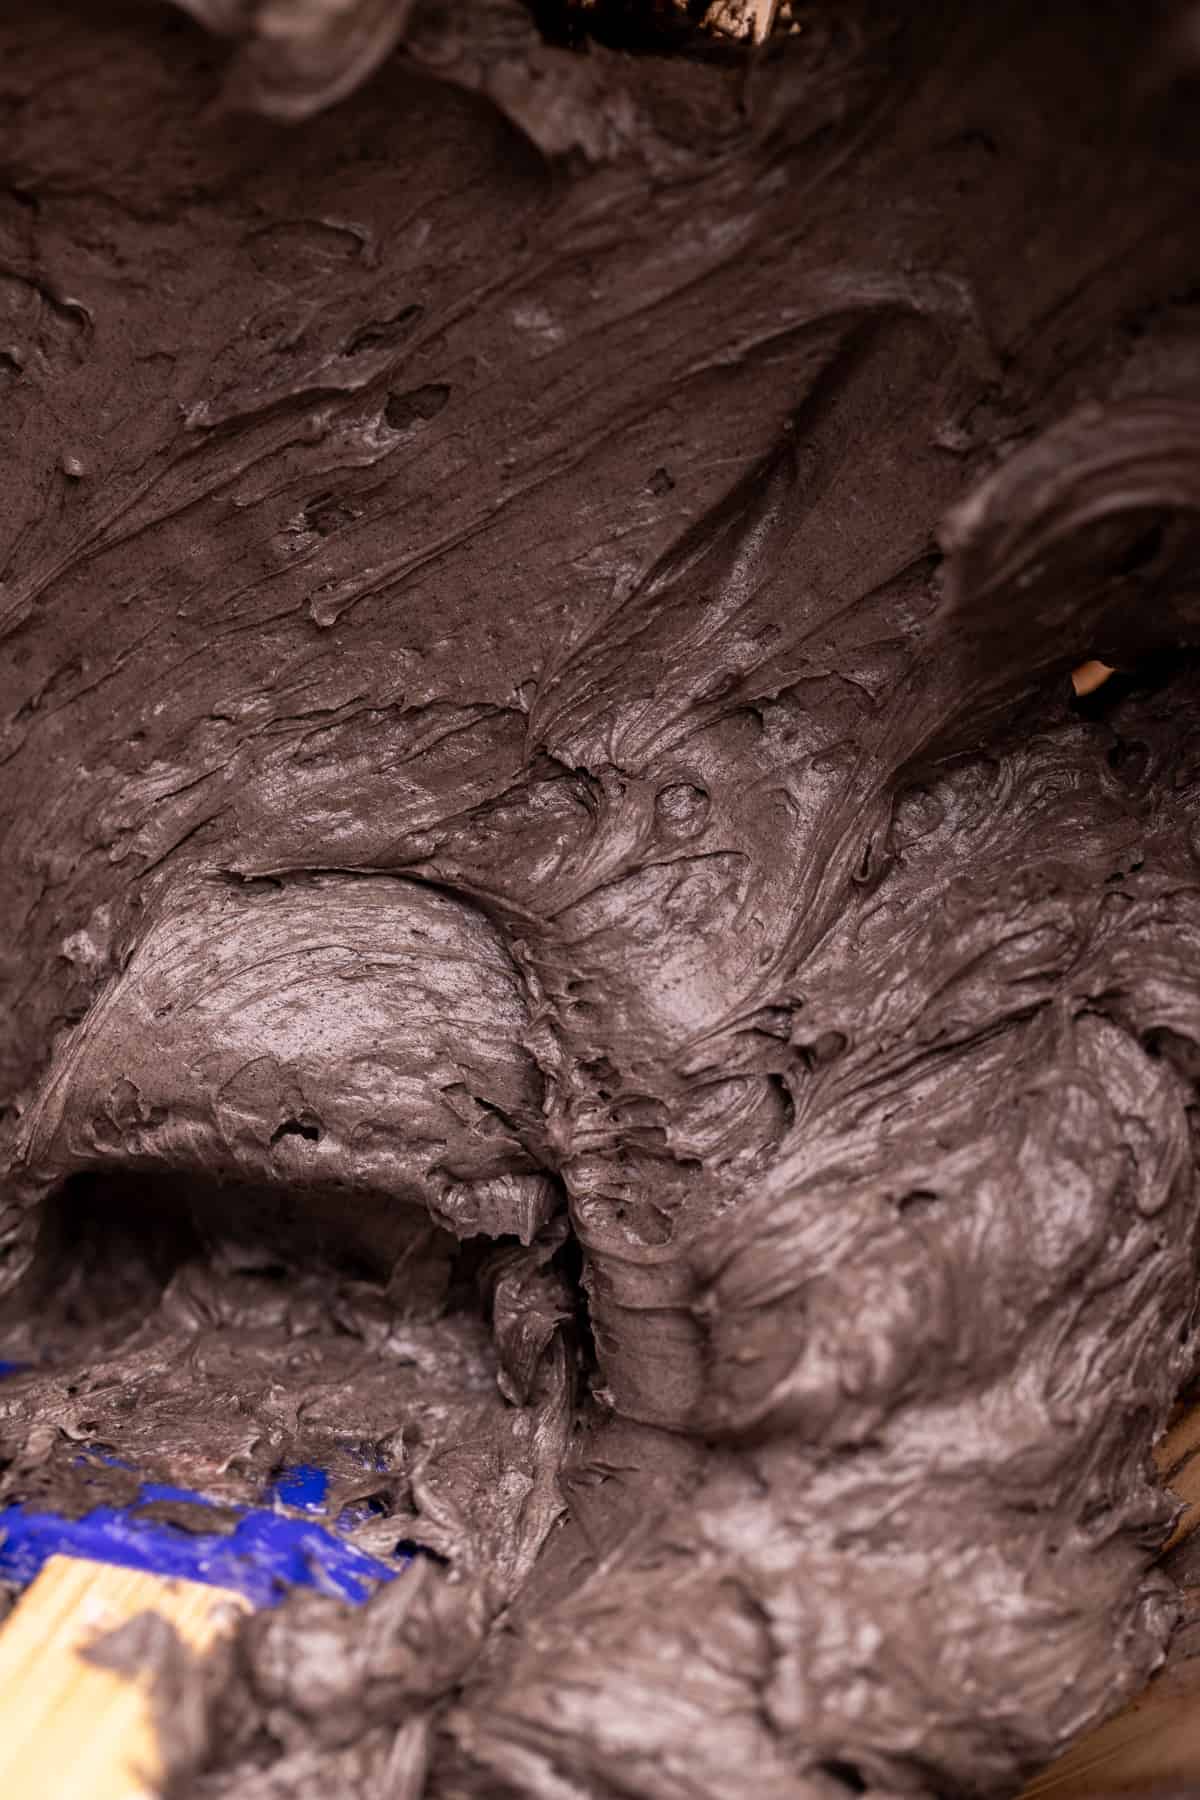
STEP 6: Crumb coat. Spread a light layer of frosting over the whole cake. Then, place the cake in the freezer for 10 minutes to set.
STEP 7: Frost. Frost the rest of the cake.
STEP 8: Decorate. Place your chocolate decorations on top of the cake. I used Endangered Species Chocolate Milk Chocolate Bars melted into skull molds for my decorations.
Expert Baking Tips
- Properly measure the flour- Make sure the flour is spooned and leveled. If you stick the measuring cup directly into the flour, it will compact the flour. Compacted flour can cause the cake to be dry.
- To easily remove the cake from the pan, make sure to first spray the pan with baking nonstick spray. Then, line bottom with parchment paper and spray it again to make sure that the paper does not stick to the bottom of the cake too much. If you miss any spots with the spray they can stick and tear the cake so be thorough.
- For high altitude baking add 2 Tbsp of flour to the cake batter.
FAQ
Yes you can make the cake ahead of time! Once the cake layers are done cooling, wrap tightly in plastic wrap. Then, freeze up to 30 days. Pull them out 1 hour before decorating.
Yes you can. You can use a 9 inch cake pans, but it will be thinner. You can also use 6 inch cake pans for a 3 layer cake.
Black velvet uses buttermilk, just like red velvet cake. Black velvet cake also uses black cocoa, which has been extra processed with an alkaline solution to remove acidity for a smoother flavor with no bitterness. This is process is what makes Dutch processed chocolate. Black cocoa is ultra-Dutch processed.
Red velvet is a type of chocolate cake made with buttermilk. It gets its red color from food coloring. Black velvet is nearly identical, but uses black cocoa powder and generally uses black food dye to deepen the black color.
Recipe Variations
- Halloween Chocolate Cupcakes- This recipe will make roughly 24 cupcakes.
- Naked Cake- If you prefer a naked cake with very little frosting you can halve the frosting recipe. Then, simply use a cake scraper to spread a very thin layer of frosting on the outside with the cake layers showing through.
Special Tools
- Cake pans: I use Wilton 8-inch cake pans.
- Parchment paper circles: I used 8-inch parchment paper circles for the bottom of the pan. I love to use the premade circles, so I don’t have to cut it out of regular parchment paper.
- Baking spray: I use the nonstick spray that has flour in it.
- Offset spatula: I use this to easily spread the frosting or fillings.
- Cake turntable: I use this nice Ateco cast iron turntable because it is high quality and it spins seamlessly. Some other turntables are a little jerky when they turn.
- Cake scraper: I use a metal scraper to get smooth cakes.
- Piping bags: I like these 18- inch piping bags since they hold more.
- Piping tip: I love this Wilton 1M to pipe frosting.
Storing and Freezing
Store this Halloween chocolate cake in an airtight container like a cake carrier. Store in the fridge up to 5 days.
You can freeze the Halloween chocolate cake in individual slices. Place the cake slices in an airtight container and freeze up to 30 days.
Other Layered Cake Recipes To Try
Try these fall recipes too!
- Pumpkin Chocolate Chip Cookies
- Apple Cider Muffins
- Puff Pastry Apple Tart
- Apple Cider Cheesecake
- Pumpkin Cream Cheese Muffins
Make sure to leave a STAR REVIEW if you loved this recipe! Make sure to tag me
Halloween Chocolate Cake
Ingredients
Black Velvet Cake
- 2 1/2 cups All-purpose flour
- 1 cup Black cocoa powder
- 2 cups White granulated sugar
- 2 1/2 tsp Baking powder
- 1 1/2 tsp Baking soda
- 1 tsp Salt
- 3/4 cup Oil, canola or vegetable
- 1 tsp Pure vanilla extract
- 1 cup Buttermilk, room temperature
- 4 Large eggs, room temperature
- 6 oz Endangered Species Chocolate, I used smooth 72%
- 1 cup Hot water, hot and steaming
- Black food dye, just a few drops
Black Frosting
- 2 1/2 cups Unsalted butter, room temperature
- 3 cups Powdered sugar, sifted
- 1/2 cup Black cocoa powder
- 1 tsp Pure vanilla extract
- 1/4 tsp Salt
- Black food dye
Instructions
Black Velvet Cake
- Preheat the oven to 350℉. Spray two 8-inch cake pans with baking nonstick spray. Line the bottom of the cake pans with parchment paper. Spray again.
- In a large bowl, mix the flour, black cocoa powder, sugar, baking powder, baking soda, and salt. Set aside.2 1/2 cups All-purpose flour, 1 cup Black cocoa powder, 2 cups White granulated sugar, 2 1/2 tsp Baking powder, 1 1/2 tsp Baking soda, 1 tsp Salt
- In a separate bowl, mix the oil, vanilla, eggs, melted chocolate, and buttermilk. Mix until combined. Add a few drops of black food dye and mix again.3/4 cup Oil, 1 tsp Pure vanilla extract, 1 cup Buttermilk, 4 Large eggs, 6 oz Endangered Species Chocolate, Black food dye
- Pour the hot water into the wet ingredients. Mix it in slowly. Pour the wet ingredients into the dry. Mix until just combined.1 cup Hot water
- Pour the batter equally into the two cake pans.
- Bake for 30-34 minutes. Bake until a toothpick inserted comes out clean.
- Let the cakes sit in the hot pans for 10 minutes before transferring to a cooling rack. Cool completely before decorating.
Black Frosting
- In a large bowl, sift the powdered sugar and black cocoa powder together.3 cups Powdered sugar, 1/2 cup Black cocoa powder
- In a mixing bowl using a mixer, beat the butter on high speed for 3 minutes. Scrape the bowl with a rubber spatula.2 1/2 cups Unsalted butter
- Add in half of the powdered sugar and mix on low until combined. Then, add in the rest of the powdered sugar. Add in the vanilla, salt, and a few drop of black food dye.1 tsp Pure vanilla extract, 1/4 tsp Salt, Black food dye
- Mix on high speed for 2 minutes. The frosting will be creamy.
- Place the first cake layer down. Spread 1 cup of frosting over the cake. Place the last layer of cake down. Spread a light layer of frosting over the cake and freeze for 10 minutes.
- Frost the rest of the cake.
Absolutely Adorable!!!!!